In today’s digital world, where most of our lives are enclosed in a pocket device like the iPhone, data loss can turn into a real nightmare. Imagine losing years of photographs, valuable conversations, important documents or essential work records due to hardware failure, theft or even a simple human error. It is a scenario that no one would like to face, yet, without a solid backup strategy, is a concrete possibility. Fortunately, Apple offers robust solutions to safeguard your data, and local backup on Mac is one of the most reliable and controlled methods. This approach not only guarantees you full sovereignty over your data, but also offers greater speed in restoring than cloud solutions, especially for those with less performing internet connections or huge amounts of data to move. From the simple cable connection to the convenience of the Wi-Fi backup, through fundamental data encryption and storage on external media, this guide aims to explore every facet of the process, providing you with the knowledge and tools to build an unattachable digital security strategy. It's not just copying files, but preserving your digital memory, your productivity and your tranquility. We will face every step clearly, from how to connect devices, to the interpretation of backup options, to the resolution of the most common problems, offering a complete overview that goes beyond the simple “click here”. Prepare to make your iPhone data safe as ever before, maximizing the power and integration of your Apple ecosystem.
Backup Roots on Mac: From iTunes to Finder and Beyond
The history of backup of iOS devices on Mac is a journey that reflects the evolution of Apple operating systems and user needs. Originally, iTunes was the nerve center of each interaction between iPhone/iPad and Mac, acting as a music manager, film, app and, of course, as a primary tool for backup. This comprehensive application has played its role for many years, becoming a family resource for millions of users. However, with the expansion of the Apple ecosystem and the growing complexity of its functions, iTunes has become more “heavy” and less intuitive. The era of macOS Catalina (10.15) marked an epochal turn, with Apple who decided to dismantle the features of iTunes in more specialized apps and slender: Music, Podcast and TV for entertainment, and above all, the Finder for managing files and iOS devices. This transition was not only a change of name or interface; it represented a redefinition of the device management philosophy. The Finder, being the native application for file management on Mac, assumed the role of hub for backups, making the process more integrated with the general user experience of the operating system. For users with macOS 10.15 or later, the backup of the iPhone becomes an operation that naturally fits into the daily workflow, treating the iPhone almost as an external drive connected to the computer. This evolution has brought significant benefits, including increased speed in access to backup functions and less complexity in the interface. Despite this, for those still using less recent versions of macOS, such as Mojave (10.14) or earlier, iTunes remains the only available tool for local backup. It is essential to understand this distinction to be able to navigate correctly between the available options and choose the path that best suits your hardware and software setup. This duality, although it may seem a complication, ensures that users with less recent systems are not left behind, maintaining essential compatibility. Understanding this story and current architecture is the first step to master the creation of effective and secure backups, laying the foundations for proactive management of your digital data. Whether you use the Finder or iTunes, the goal remains the same: to create a full and reliable copy of your iPhone, a leap against the unpredictability of the technological world.
Run Backup with Cable: The Via More Robusta and Checked
Cable backup, although it may seem like a traditional method in an era dominated by wireless, remains the most reliable, fast speed and subsidiary to safeguard your iPhone data on a Mac. Physical connection minimizes interference and maximizes transfer speed, making it the ideal option for the first time, for consistent backups or to solve Wi-Fi connectivity problems. The process varies slightly depending on the version of macOS in use. For systems with macOS 10.15 Catalina or later, the heart of the operation is Finder. Once you connect your iPhone to your Mac via the Lightning cable (or USB-C for the latest models), it is essential to authorize the connection on both devices, unlocking your iPhone and touching “Autorizza” when required. In the Finder, the iPhone will appear in the “Positions” section of the sidebar. By clicking on the name of your device, you will have access to a number of panels, including the “General”, where the “Backup” option resides. Here, it is crucial to select “Make backup of all iPhone data on your Mac”. For superior protection, the “Execute local backup encryption” option is highly recommended; you will be asked to set a robust password that will become the only key to access sensitive data (such as saved passwords, call history, healthcare data) included in the backup. Without this encryption, this information would not be saved. After setting up the desired options, a click on “Make backup now” will start the process, whose duration will depend on the amount of data and the speed of the cable and computer. It is important not to disconnect your phone during the operation. For users who still use macOS 10.14 Mojave or older versions, the witness goes to iTunes. After connecting the iPhone and clearing the connection, iTunes will start (or you will have to start it manually). The phone icon will appear at the top left of the iTunes interface. Selecting it, the summary page of the device will open. In the “Backup” section, you will need to choose “This computer” for local backup. Here too, the “Coding Local Backup” option is available and equally essential for the security of your data. Once configured, the “Effettua backup now” button will start saving. Regardless of the software used, cable backup provides an immediate sense of security and complete control over the destination and protection of your data, making it a fundamental pillar of any well-designed backup strategy. Always remember to check the available space on your Mac before starting a large backup, to avoid unwanted interruptions.
Wireless Freedom: Backup iPhone on Mac Wireless Via Wi-Fi
Technological advancement has made possible many operations without the need for cables, and the backup of the iPhone on Mac is no exception. The ability to back up wireless via Wi-Fi offers unparalleled comfort, eliminating the cable footprint and allowing the iPhone to update its security copy almost automatically, provided certain conditions are met. This method is particularly useful for those who want to keep their data constantly updated without the burden of physically connecting the device each time. The key to enabling this feature lies in having it previously configured at least once by cable. In fact, to activate the Wi-Fi backup, you must initially connect your iPhone to your Mac with a cable and, through the Finder (or iTunes for older macOS versions of Catalina), access your device settings. In the “General” panel (or “Review” in iTunes), scroll to the “Options” section and put the check mark next to the item “Show iPhone if you activate the Wi-Fi connection” (or “Sync with iPhone via Wi-Fi” in iTunes). After saving this setting, your iPhone will be able to communicate with your Mac and appear in the Finder sidebar (or iTunes) whenever both devices are on the same Wi-Fi network. It is an essential requirement that both the iPhone and Mac are connected to the local Wi-Fi network*. Once your iPhone appears in the Finder, the procedure to start the backup is identical to the cable one: select the device, go to the “General” section (or “Review”) and click on “Restore now”. If you have already enabled local backup encryption, this setting will be maintained. The main advantage of this method is its practicality: once configured, backup can take place in the background, for example at night while the phone is in charge and connected to Wi-Fi. However, it is important to consider that the speed of the Wi-Fi backup can be lower than the cable one, depending on the quality of your Wi-Fi network, the distance from the router and any interference. Also, for security reasons, it is always advisable to use a private and password-protected Wi-Fi network, avoiding public or unencrypted networks when performing sensitive operations such as backups. If the iPhone does not appear in the Finder despite being connected to the same Wi-Fi network, the first step is to ensure that the option “Show iPhone if you activate the Wi-Fi connection” is actually enabled, otherwise a cable reconnection will be necessary. This method, while offering invaluable flexibility, requires minimal initial configuration and a stable network environment to work best.
Unveil the Content: What Precisely Includes an iPhone Backup on Mac?
Understanding what is actually included and what is excluded from an iPhone backup on Mac is essential for a conscious and complete management of your data. Many users believe that a backup is an exact and integral copy of their device, but reality is slightly more articulated. A local backup on Mac is incredibly comprehensive and covers a wide range of personal information and device settings, acting as an almost complete “photography” of your iPhone at a given time. Among the elements included are: app data (such as preferences, documents and game saves, but not the apps themselves that are downloaded again from the App Store at the time of restoration), device settings (home screen layout, Wi-Fi settings, backgrounds, notification settings), call history and messages (SMS, iMessage, MMS), health data, wallet data (if encrypted), homeKit configuration information, memories and photo albums (but not photos of iCloud Photo Library if this is active), ringtones, voice recordings and media files (music, video) that are not already synced via iCloud. If you choose to encrypt your backup, sensitive information such as password saved website history and more delicate health data, elements which would otherwise be omitted for security reasons. However, there are some data categories that, by design or by the nature of their operation, *not* are included in a local backup. This includes: contents already synchronized and stored on iCloud (such as photos if iCloud Photo Library is active, iMessage if Sync messages with iCloud is active, contacts, calendars, notes, reminders, Safari data if synchronized with iCloud), Face ID or Touch ID data, Apple Pay settings, activities and Mail data (if configured as an IMAP account), and apps themselves (the app installation only) This distinction is crucial: if you rely on iCloud for certain data categories, a local backup will not replicate what is already secure on the cloud. An ideal backup strategy often combines both approaches – local backup on Mac for a full copy of device settings and specific data, and iCloud for continuous synchronization of essential information between all your Apple devices and for an additional off-site security level. Knowing these nuances allows you to configure your backup options smartly, ensuring that all your data, whether local or cloud, are adequately protected and recoverable in case of need.
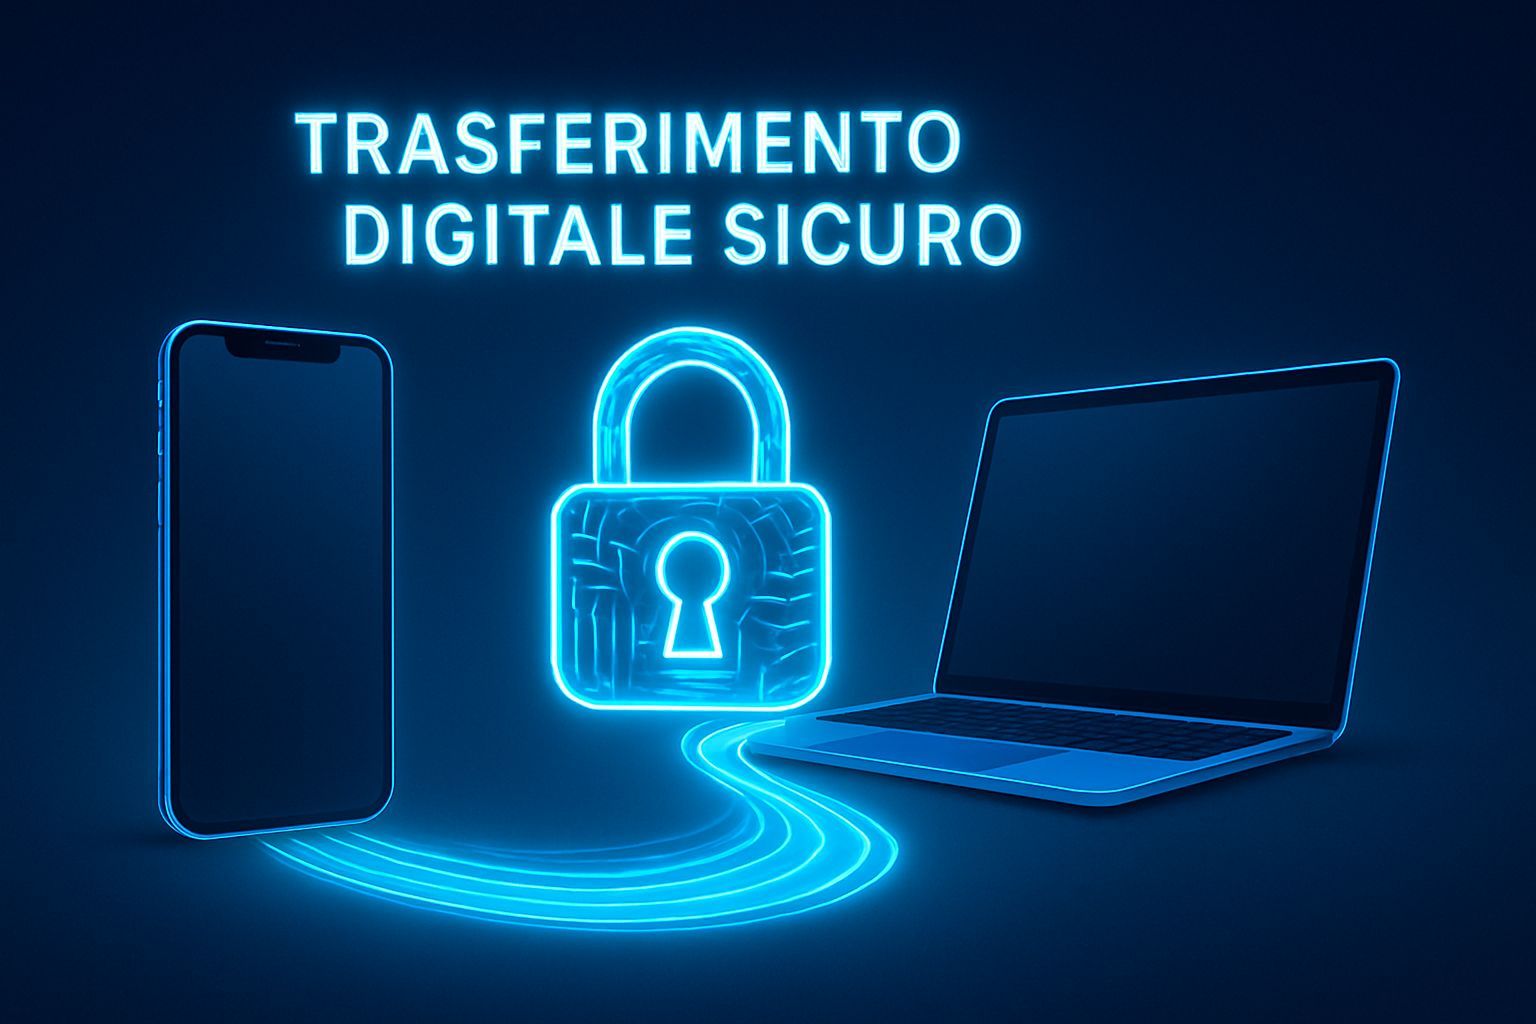
The Crucial Importance of Encryption: Protect Your Backup Sensitive Data
In the digital security landscape, encryption is your most powerful armor, and its application to iPhone backups on Mac is absolutely non-negotiable for anyone who cares about their privacy and the security of their personal data. Enable the function “Execute local backup encryption”, both in Finder and iTunes, is not just a recommendation; it is an essential practice that elevates the level of protection of your data to a higher level. Without encryption, a local backup is a “clear” or almost vulnerable data archive to anyone who has physical access to your Mac or, worse, can infiltrate your system. This means that information such as call history, messages, photos, app data and device settings would be exposed. But the most critical aspect of encryption is sensitive data that otherwise would not even be included in the backup. Let's talk about password saved in the iCloud Keychain (which, although synchronized, can be recovered more easily from an encrypted backup), of your web browsing historyof the health data detailed (which may include extremely personal information), settings HomeKit and other private information. Encryption transforms your backup into a digital fort, where each bit of information is encoded and unreadable without the right key: your password. The choice of a strong and unique password is therefore of utmost importance. It should not be easy to guess, it should not be recyclable from other accounts and should include a combination of uppercase and lowercase letters, numbers and symbols. Once set, this password will become the key to access your backup in case of restoration and, more importantly, will be the only way to view the sensitive data included. Losing or forgetting this password means losing access to these encrypted data, even if the backup itself remains intact. Therefore, it is imperative to keep this password in a safe place, maybe using a reliable password manager or annotating it in a safe physical place only accessible to you. Despite the importance, Apple does not offer a password recovery mechanism for a local encrypted backup. This underlines the user’s responsibility for managing it. Investing a few more minutes to set up a secure password and keeping it with care is a small price to pay for the tranquility of knowing that your most personal data is protected by indiscreet eyes, both on your Mac and in case of transferring backup to external media. Encryption is not an option, but a pillar of your digital security strategy.
Advanced Backup Management: Space, Versions and External Storage
Backup management does not run out with their creation; it is a continuous process that requires attention to storage space, management versions and thestorage on external media for optimal safety. With time, multiple backups can occupy a considerable amount of space on your Mac, especially if you own different devices or if your iPhone contains many data. Every backup, in fact, is an almost complete copy of your device and can easily exceed several dozen, if not hundreds, of gigabytes. It is therefore essential to know how to identify and manage these security copies. The default folder where macOS saves backups is ~/Libreria/Application Support/MobileSync/Backup/. Access this directory via the Finder (using “Go” > “Go to the folder” and paste the path) will reveal a number of folders with alphanumeric names, each representative a distinct backup. To identify a specific backup, you can right-click a folder and select “Get Information” to view the date of the last change, which usually coincides with the backup date. Here comes the importance of managing space: you can delete outdated backups of devices that you no longer have or older versions that you don’t feel any more useful. However, it is always advisable to maintain at least one or two recent versions of the most important backups. Storage on external hard disk drive is a logical extension of this management. You cannot direct an iPhone backup directly to an external disk, but the workaround is simple and effective: first you create backup on your Mac, then move it. After identifying the desired backup folder, you can simply drag it to the icon of your external hard drive (which must be connected to your Mac and formatted in a compatible format like APFS or HFS+). This practice not only frees valuable space on your internal disk, but also provides an additional level of redundancy. Imagine if your Mac had an irreparable failure: without an external copy, your local backup would be lost. Move backups to an external drive, protect them from a single failure point. In addition, you can use different hard drives to create multiple “offline” copies of your data, a practice known as “cold backup”, which also protects them from cyber threats like ransomware. It is advisable to clearly label external disks with backup dates and content. For even greater control, consider encryption of the external hard drive itself, to protect encrypted backups already contained within it. Advanced backup management is not only a matter of space, but of building a security strategy on multiple levels, ensuring that your data is always accessible and protected, regardless of the unexpected.
Recover Your Data: The Restore Process from a Local Backup
Creating a backup is only half of the story; the true utility of a security copy manifests itself when needed restore your data on a new iPhone or existing one after a reset or a problem. The recovery process from a local backup on Mac is equally crucial and requires the same attention to the details of the creation phase. To start the recovery, it is necessary first of all that the iPhone is in a condition in which it can be restored: ideally, just turned on for the first time (new or after a factory restoration) or in recovery mode. Connect your iPhone to your Mac via cable. If your iPhone is new or newly restored, follow the initial instructions on the screen until the “App and Data” screen appears, where you will be asked if you want to restore from a backup. If you are resetting on an iPhone already configured, you will first need to make a “Restore factory settings” (Settings > General > Transfer or initialize iPhone > Initiate content and settings). Once the iPhone is connected and ready, open the Finder (or iTunes) on your Mac and select your iPhone from the sidebar. In the “General” panel (or “Review”), you will find the option “Restore Backup...”. By clicking on this entry, you will be presented a list of backups available on your Mac, identified by date and, if you have multiple devices, by device name. Select the most recent or desired backup. If the backup you have chosen is encrypted, you will be prompted to enter the password you set when creating the backup. This is the crucial password we talked about, and without it you will not be able to access sensitive data included in the backup. Once you have entered your password and confirmed, your Mac will begin to transfer your backup data to your iPhone. The time needed for restoration varies depending on the size of the backup and speed of your Mac and cable. It is essential not to disconnect the iPhone during this process. The iPhone may reboot several times during restoration. Once you have completed the transfer from your Mac, your iPhone will continue the internal configuration process and download apps from the App Store, so it may take some time before it is fully operational with all your data and apps restored. If you had moved your backup to an external hard drive, you will first need to copy the backup folder from the external drive to the original directory on your Mac (~/Libreria/Application Support/MobileSync/Backup/) before you can select it for restoration. In case of problems, such as backup that is not recognized or errors during restoration, make sure the cable is working, that the Mac is updated and that there are no background processes that may interfere. A reboot of both devices can often solve small hitches. The recovery process, if executed correctly, is the culmination of your backup strategy, returning an iPhone practically identical to how you left it, with all your intact data and in their place.
Local Backup vs. iCloud: A Deep Comparison for Your Strategy
When talking about data protection on iPhone, the choice between local backup on Mac and backup to iCloud it is not a matter of “what is better”, but rather of “what is more suitable for my needs” and, in many cases, of “how to combine both for optimal protection”. Both solutions offered by Apple have distinct advantages and disadvantages that deserve a thorough analysis to build a truly resilient backup strategy. The local backup on Mac, as we have explored, offers maximum control over your data. Physically, you know where your backups are and you have the ability to move them to external hard drives or manage them without depending on an internet connection. Backup and restore speed is often higher, especially for large backups, as data travel on a wired connection or on your local network. This method is ideal for those who have data privacy concerns in the cloud, want to maintain multiple versions of their backups (which is more difficult and costly with iCloud) or simply don't have enough space on iCloud or a high-performance internet connection. However, local backup requires that you actively connect your iPhone to your Mac (or that Wi-Fi is configured and stable) and that your Mac is available. In addition, if your Mac is to suffer irreversible damage or lost, and backups have not been copied to an external drive, you will lose access to your data. On the other hand backup to iCloud offers unparalleled comfort and security. Once configured, the iCloud backup is automatically and in the background whenever the iPhone is connected to the Wi-Fi, in charge and with the screen locked. This means that your data is constantly updated without your manual intervention. iCloud protects your data with end-to-end encryption for many categories (such as iCloud Keychain, Health Data) and robust encryption for others, making them accessible wherever you have an internet connection, on any Apple device. It is the perfect solution for mobility and to protect you from catastrophic events that affect your local environment. The reverse of the iCloud Medal is the space: Apple offers only 5 GB free, a rapidly insufficient amount for most users, requiring a paid subscription for larger plans. The backup and recovery speed depends entirely on your internet connection, and for very large backups it can be a slow process. Finally, although iCloud security is high, it relies on a third (Apple), which for some raises issues of data sovereignty. The hybrid strategy is often the best choice: use iCloud for continuous synchronization of contacts, calendars, notes, photos and documents you want accessible on all your devices and protected “off-site”, and simultaneously perform local backups on Mac regularly (for example, once a week or before important updates) to have a complete and controlled copy of your device. This approach offers the best of both worlds, ensuring that your data is always protected, updated and recoverable in different circumstances.
Beyond General Backup: Specific Strategies for Sensitive Data and Apps
While a full backup of the iPhone on Mac is an essential security measure, some types of data and applications deserve special attention, with backup and sync strategies that go beyond the simple copy of the device. Understanding this specificity can prevent unexpected data loss and ensure that your most critical information is always safe. One of the most discussed backup applications is WhatsApp. General backup of your iPhone on Mac *includes* WhatsApp conversations and related media, provided you have not configured WhatsApp Auto Backup on iCloud Drive. If you enable WhatsApp backup to iCloud Drive (via the internal settings of the WhatsApp app), your conversations will be saved there separately, and in that case, they will no longer be included in the local backup of the iPhone, as they are already considered “in the cloud”. It is important to choose one of the two options and keep it consistent. If you rely on the local backup, make sure that the WhatsApp backup on iCloud Drive is disabled or that its latest execution is not too recent, not to create unnecessary confusion or overlap. For photos and videos, the situation is even more stratified. If you ICloud Photo Library is active on your iPhone, all your photos and videos are automatically synced and stored in the cloud, and *non* are included in the local backup of iPhone (because they are already “in the cloud”). In this scenario, your local backup will only include photo settings and previews. For extra redundancy, you can download the original photos from iCloud on your Mac (via the Photo app) and then copy them to an external hard drive. Other popular photo backup solutions include Google Photos, Dropbox Camera Upload or Amazon Photos, which offer independent cloud synchronization from iPhone backup. For contacts, calendars and notes, synchronization via iCloud, Gmail, Outlook or other cloud services is almost always the default and most effective option. This data is kept up to date on all your devices in real time, making local backup less relevant for their specific safeguard. It is crucial to ensure that these synchronizations are active and functioning properly to avoid losses. Finally, the third-party solutions for iPhone backup often offer more granular features than Finder/iTunes. Software such as iMazing, AnyTrans or dr.fone can allow selective backups (for example, only messages, only WhatsApp, only certain apps), partial resets or the most advanced management of backup versions. These options are valuable for experienced users who need more flexibility or for those who encounter difficulties with native methods. However, the use of third-party software requires caution: choose only reliable and well-reviewed solutions, and make sure you fully understand the operation before you entrust your data. Integrating these specific strategies with your general backup on Mac creates a robust and multi-level data protection system, ensuring that no valuable information is left to chance.
Solving Common Problems: Block Resolution Guide in Backup
Even with the best intentions and following the instructions to the letter, backup processes can occasionally encounter hitchs and generate frustration. Dealing with common problems with a methodical approach is the key to quickly solve them and restore the tranquility of your data security strategy. One of the most frequent problems isiPhone that is not recognized from Mac. Start by checking the Lightning cable (or USB-C): try with an original Apple cable or an MFi certified cable, and make sure it is securely connected to both your iPhone and your Mac. Try different USB ports on your Mac. Check that your Mac software is updated to the latest version compatible with your hardware and that your iPhone has the latest version of iOS. Reboot both iPhone and Mac; this simple operation can solve many communication problems. If the problem persists, check your privacy and security settings on your iPhone, making sure you have authorized your computer when required. Another common obstacle is thedisk space failure on the Mac. iPhone backups can be very big, and if your internal disk is almost full, the backup will fail. Before starting a backup, check the available space (Finder > About this Mac > Storage space) and, if necessary, frees space by eliminating unnecessary files, emptying the trash, or moving large files on an external disk. As we have seen, you can also move old backups to an external drive to make space. The excessive backup slowness or its block is another complaint. Very often, this is due to the amount of data to be transferred or to problems with the cable or door. If you are doing a Wi-Fi backup, the quality of your network (weak signal, interference, other devices that consume bandwidth) can dramatically affect speed. Try to approach your Mac and iPhone to the Wi-Fi router or connect via cable for a faster experience. temporarily disables VPNs or firewalls that may interfere with communication between devices. Rarely, a backup might corrupt. This can happen due to sudden disconnections, system errors or space problems. If a backup is corrupted and cannot be restored, unfortunately, there is not much to do if not discard it and create a new one. This emphasizes the importance of having more backups and periodically testing reboots to make sure they are valid. Finally, if you have problems with encryption password (you have forgotten it or cannot unlock backup), unfortunately, without the correct password, there is no way to recover encrypted data. This reinforces the importance of annotating it and keeping it in a safe place. In all these scenarios, patience and systematic approach are your best allies. Do not hurry to disconnect your devices or restart without first diagnosing the problem. Most of the time, a small adjustment or restart solve the situation, allowing you to continue with your stress-free backup routine.
Towards a Complete Backup Strategy: Resilience of Data in Digital Era
In the current digital panorama, where our life is inherently linked to the devices we carry in our pockets, data loss is no longer a matter of “ifs”, but of “when”. Building a full and resilient backup strategy it is not a luxury, but an impelling necessity, an investment in mental tranquility and the continuity of your digital life. This article explored the multiple facets of iPhone backup on Mac, from cable and wireless method, to in-depth understanding of what is included in backup, crucial importance of encryption, to advanced backup management on external media and common problems. We also compared the local and iCloud backup options, demonstrating how often the ideal solution resides in an approach hybrid: Use both systems to cover their gaps and maximize protection. The rule of the 3-2-1 is a fundamental mantra in this context: having at least 3 copies of your data, store them on at least 2 different types of support, and maintain at least 1 copy “off-site” (i.e., in a geographically separate position). For the iPhone and Mac user, this could result in: the original copy on the phone (1), a local backup on the Mac (2), and a copy on an external hard drive (3) or iCloud (4), with the latter acting as an off-site copy. This redundancy level ensures that even in case of a catastrophic event such as theft, fire or multiple hardware failure, your most valuable data is always safe and recoverable. In addition, the adoption of good practices goes beyond the mere backup execution. It also means regularly test your backups, carrying out a recovery on a test device or simulating the operation to ensure that the data is intact and accessible. It means keeping both iOS and macOS up to date, as updates often include improvements to stability and security of the backup process. It means being proactive in managing storage space, both on your Mac and on any external hard drives. And, perhaps the most important thing, means being diligent with encryption passwords, keeping them inaccessible to third parties but always at hand for you. Your iPhone is not just a device; it is an extension of your memory, creativity and connections. Protecting it with a solid backup strategy is an act of self-preservation in the digital age. Don't let the fate of your most important memories and information happen. Armed with the knowledge and advice provided in this guide, you now have all the tools to build and maintain a backup system that allows you to navigate the digital world with confidence and tranquility, knowing that your data is safe, always and anyway.


