Many everyday household appliances, from the faithful iron to the efficient microwave, can stop working properly because of a trivial problem to their electric plug or cable. A damaged plug is not only a nuisance that interrupts the operation of the appliance, but can pose a serious risk to safety, causing short circuits, electric shocks or even fires. Dealing with the repair of a plug may seem like an expert company, but with the right knowledge, the appropriate tools and careful observation of safety standards, it is a successful operation. This guide is designed to accompany you step by step in the process of replacing an electric plug, whether of the Italian type, Schuko or other single-phase types, transforming a potential danger into a simple domestic maintenance intervention.
When Needed Intervention on Electric Spin
Identifying the need to replace an electric plug is the first step to ensure the safety and functionality of your devices. The signals of a malfunction are often obvious and should never be ignored. If the plug of your appliance is visibly damaged, perhaps with broken plastic or the twisted pins, it is a clear indicator that needs to be replaced. Even a cable that, at the slightest bending, causes power interruptions to the appliance, or that generates visible sparks at the height of the plug, signals a serious problem that requires immediate intervention. Unusual rumours, burning smell, or the plug that overheats when inserted in the socket, are all alarm bells that should not be overlooked. In these cases, attempting to continue using the appliance can be extremely dangerous. The replacement of the plug is not only a matter of restoring the operation, but of preventing much more serious accidents.
Security First of All: A Essential Warning
Before undertaking any operation involving the electrical system or devices powered by the network, it is essential to understand and comply with strict safety standards. Although the replacement of an electric plug is not a particularly difficult task, it still implies the manipulation of components that, if handled improperly, can cause very serious accidents, such as electrocution, short circuits or fires. It is crucial to remember that this guide has an informative character and cannot replace the training and experience of a qualified electrician. You are not becoming a professional by reading these instructions; you are acquiring skills for specific intervention. For this reason, if you do not have the least experience with electrical work, if you have doubts about your ability to follow the instructions accurately or if the appliance is of high power or complexity, it is always advisable to contact a specialized technician. Your safety and others must never be compromised. It is the individual’s responsibility to ensure that he has fully understood each step and to operate in a safe and controlled environment. In no event shall we assume responsibility for any damage to persons or things arising from an incorrect or unprudent application of these instructions.
Indispensable tools for work
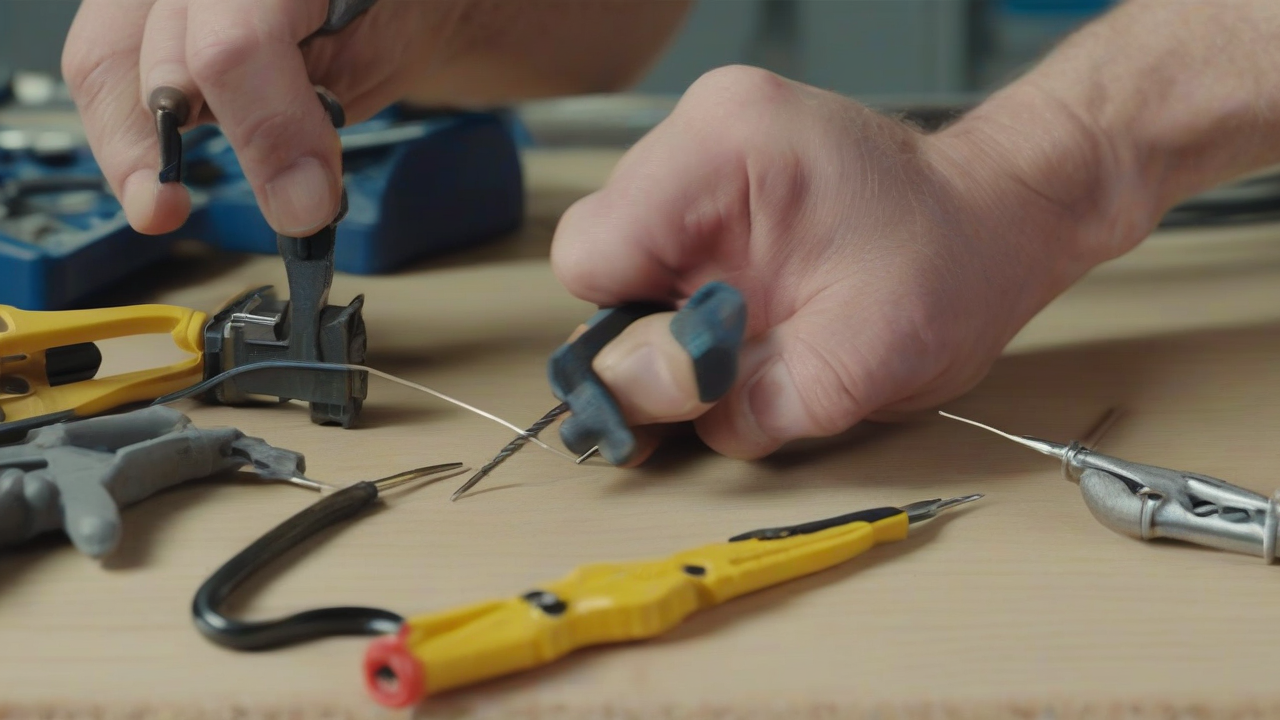
To replace an electrical plug effectively and safely, it is essential to have the right tools. Appropriate equipment not only facilitates work, but also reduces the risk of errors and accidents. Here is a list of tools that should not be missing:
- Electrician scissors or cutter: Useful to affect the external cable sheath. It is essential to use them with extreme caution in order not to damage internal threads.
- Spellacavi (recommended): This tool is specifically designed to remove insulation from internal cables without affecting copper conductors. A good spelling makes the operation safer and more precise than the use of scissors.
- Cut and/or cross screwdrivers: Need to unscrew the screws of the plug and the inner clamps. Make sure you have screwdrivers in size suitable for the screws on the plug to be mounted.
- New plug: It is important to choose a plug compatible with the device and with the wall socket, paying attention to the type (Italian, Schuko, 2 or 3 pin) and the maximum supported power.
Disposing these tools before starting the job will allow you to proceed without interruption and with greater confidence.
Anatomy of a Monophase Electric Spine
Understanding the structure of an electric plug is essential for proper assembly. The single-phase plugs, regardless of their external appearance (Italian type C or L, Schuko or other standards), share a rather standardized internal configuration. Typically, a plug consists of two half plastic held together by a central screw. Inside, there are metal clamps for connecting cables, usually three: one for the phase (brown or black), one for the neutral (blue) and one for grounding (yellow/green). There is also a cable hatch, often a plastic tab, whose purpose is to block the external cable to prevent internal wires from being tractioned or accidentally slipped. Finally, a seal elbow at the input of the cable ensures additional protection and helps fix the cable to the plug. The main differences between the various types of plug concern the external form and the arrangement of the pins, but the internal connection principle remains similar.
Preparation of the Electric Cable
Correct cable preparation is a crucial step before connecting wires to the plug. This process requires precision and caution to ensure safety and durability of repair. Initially, if the cable is not peeled yet, it is necessary to affect the outer sheath. Using a pair of electrician scissors or a cutter, practice a circular engraving on the sheath about 2-3 cm from the end of the cable. It is of vital importance to perform this operation with extreme delicacy, applying a minimum pressure to avoid affecting or cutting the insulating sheaths of the internal caveats. A damage to the caveats below would expose copper in unprotected spots, creating a potential danger. To facilitate the removal of the outer sheath, you can twist it slightly in the engraving point; this movement will help to widen the slit and break it without having to cut deeper. Once you remove the sheath, you will see the three internal caveats (brown, blue and yellow/green) ready for the next steps. If the cable is already prepared, you can proceed with the next step.
Cable Connection: Detailed Steps
With the external sheath removed and the open plug, it is time to connect the cables to the internal clamps. This is the most delicate phase and requires maximum attention:
- Thread the seal and open the plug: After removing the outer sheath of the cable, take the new plug. Unscrew the central screw that keeps the two half plastic and open them completely. Inside, near the cable entry hole, you will find a gasket elbow; put it on the cable before continuing. Afterwards, locate the cable clip (often blue) held by two screws. Unscrew these screws and set aside the tab and screws in a safe place not to lose them.
- Turning of the internal cables: The three internal caves (brown for the phase, blue for the neutral, yellow/green for the ground) must be peeled for a length of about half a centimeter, maximum one centimeter. The use of one spelling it is highly recommended, since it allows to remove the insulating accurately, without risking to cut the thin copper wires inside. If you use scissors, be careful not to cut copper. The peeling process is similar to that of the outer sheath, but on a reduced scale.
- Preparation of conductors: Once peeled, the copper wires may show up a little bit. To facilitate insertion in the clamps and ensure a solid connection, you can gently twist the ends with your fingers, just as you would to give a tip to a piece of paper. This will help to hold all copper filaments together.
- Connection to terminals: Inside the plug, you will find the metal clamps. Unscrew their screws (not completely, just enough to open them). Place the brown cave in one of the side clamps, and the blue cave in the other side terminal opposite. Finally, connect the yellow/green cave (grounded) into the central clamp. According to CEI (Italian Electrical Committee), clamps may have specific indications for phase and neutral; it is good practice to respect them.
- Clasp closure: Make sure that all copper wires are fully inserted into the clamps and that no filament is left out or bent abnormally. Hold the clamp screws tightly. A weak connection can cause overheating or disconnection.
Final Spine Closure and Verification
Once you connect the cables, the focus moves on the closing and final verification of the plug, a crucial step for safety and functionality:
- Clamp application: Place the cable clamp tab (the one you put aside) above the outer cable sheath, not above the insulated internal wires. String the two screws with decision, but without exceeding in strength, to avoid damaging the sheath. The cable hanger has the function of preventing the cable from being torn out of the plug, risking internal connections.
- Seal positioning: Slide the gasket elbow previously threaded onto the cable until you place it just after the cable stop, so that it is in the same original position. This seal provides additional protection at the cable entry.
- Union of the two half of the plug: Assemble the two half of the plug, ensuring that it fits properly and without resistance. Pay maximum attention at this stage: the cables inside should not be tense, but not even a tangle. If during the closure you feel resistance, it is very likely that a cable has been pinched between the plastic tabs or, worse, under the closing screw. A pinched cable could compromise insulation by exposing copper, or being damaged by the screw itself, making the plug extremely dangerous. The closing should take place smoothly, perhaps with a slight “clack” indicating the correct alignment.
- Final locking: Once the two halves are perfectly aligned and closed, screw the central screw that keeps them united.
- Double insulation device verification: It is important to note that not all household appliances require grounding. If the original plug did not have the central piloncino (for Italian plugs) or the yellow/green cable, the appliance is probably at double insulation. These devices are designed to offer protection against electric shocks through two layers of insulation, making the connection to grounding unnecessary. In these cases, you can connect only brown and blue cables, ignoring yellow/green. This condition is valid for most modern appliances; for very old models it is always recommended a control by a professional.
Considerations on Spina Schuko
The Schuko plug, widely diffused in Europe and increasingly common in Italy, has a very different aesthetic appearance than the traditional Italian thorns. However, its internal configuration and mounting procedure are surprisingly similar. Also opening a Schuko plug, you will find the same three clamps: two places laterally by phase and neutral and one central for the grounding cable. There are also the stopper and the seal, and the whole plug is held together by a central screw. The connection of the cables follows the same pattern: brown and blue should be placed in the two opposite side clamps, while yellow/green should be connected to the central clamp, always respecting the phase and neutral indications if present. The precautions to be adopted are identical to those for Italian thorns: make sure that the copper wires are fully inserted in the clamps, avoid damaging the insulation sheaths during the closure of the plug and verify that there are no pinched cables. Despite external differences, wiring logic and the necessary attentions remain unchanged.
The General Principle for Any Monophase Spine
The skills acquired for the assembly of Italian thorns and Schuko can be applied to almost all single-phase electric thorns, including industrial ones or those used in other countries. The fundamental principle always remains the same: identify the clamps for the phase, the neutral and the earth, and connect the respective cables with precision and safety. The ground clamp, intended for the yellow/green cable, is usually centrally located or easily recognizable by specific symbols. For phase cables (brown/black) and neutral (blue), the position in the side clamps may vary slightly depending on the design of the plug, but the connection of one by side is technically correct, although the indications on the clamps (often marked with 'L' for Line/Fase and 'N' for Neutro) should be respected for uniformity with standards. The main thing is not to leave uncovered copper wires, ensure firm clamps and reassemble the plug without pinching the cables or damaging the seals. By understanding these basic principles, you will have the ability to deal with replacing almost any type of monophase plug with confidence and safety.
Conclusion
Replace a damaged electrical plug is a practical ability that can extend the life of your household appliances and, above all, improve the safety of your home. By carefully following the instructions provided in this guide, paying maximum attention to safety and choosing the appropriate tools, you can perform this operation independently and successfully. Always remember that, in the face of any uncertainty or complex interventions, the wisest choice is to rely on the experience of a professional. Prevention is the best form of safety when it comes to electricity.


