Understanding how to install Windows 7 without CD has become an increasingly common need in 2026, especially for those who want to recover old software or simply try a piece of computer history on modern or virtualized hardware. Although Microsoft has interrupted official support for many years, the charm of this operating system remains unchanged for many fans and professionals who need a stable legacy environment. In this in-depth guide, we will explore all the most effective methodologies to complete the installation without the help of old optical media, which have almost completely disappeared from modern computers. We will analyze in detail how to prepare the necessary files, how to manage the partitions of the disk and what technical measures to take to ensure that the system functions correctly also on recent hardware configurations. It is essential to remember that, being a dated software, security must be the absolute priority during each step. Using a USB stick or a virtual machine is the ideal solution to bypass the absence of a CD player, allowing flexibility that old physical media could not offer. Prepare to find out how to install Windows 7 without CD professionally, following a structured path that will avoid the common compatibility errors that many users encounter today.
Hardware and software requirements for Windows 7
Technical specifications
Before starting any technical procedure, it is essential to verify that the target computer or virtualization environment meets the minimum system requirements. In 2026, most computers largely exceed these specifications, but it is good to remember them to correctly configure resources. For the 32-bit version, you will need a processor from at least 1 GHz, 1 GB of RAM memory and 16 GB of free disk space. If you point to the 64-bit version, the requirements rise to 2 GB of RAM and at least 20 GB of storage. Do not forget the importance of the video card: to enjoy the Aero interface, typical of Windows 7, you need a GPU compatible with DirectX 9 and equipped with WDDM 1.0 driver or higher.
In addition to the basic requirements, you must consider that the hardware produced in recent years may not have native drivers for Windows 7. This means that while completing the installation, you may encounter problems with USB 3.0/3.1 ports, with latest-generation Wi-Fi network cards or modern NVMe drives. For this reason, I highly recommend that you check in advance the availability of drivers on the manufacturer's website of your PC or motherboard. In many cases, you will need to manually integrate the drivers into the ISO image before proceeding, an advanced operation that requires specific tools but that guarantees full functionality of the system once the initial wizard is finished.
Recover ISO image and Product Key
The heart of the whole operation is the ISO image of Windows 7. Since Microsoft servers no longer host direct downloads for this system, you will need to contact alternative but reliable sources. One of the safest and legally accepted options for study and storage purposes is the Internet Archive. Here you can find different versions of the system, from Home Premium to Professional, loaded by users who want to preserve the original software. Always make sure you download a version that matches your desired language and your processor architecture. Remember that downloading ISO is only the first step: to legally activate the system, you will still need a valid product key that you previously owned or that you purchased in the past.
It is vital to pay attention to security while downloading ISO files from third-party sources. Many modified versions found on the web may contain malware or unwanted software integrated. To protect you, I suggest you always check the hash SHA-1 of the downloaded image by comparing it with the original values published by Microsoft at the time of the official release. If the has corresponds, you can be sure that the file has not been tampered with. Once you get your clean copy, keep it carefully on an external backup support, as finding these files will become increasingly difficult over the years. Without an integrated ISO image and a license code, the entire installation procedure cannot be completed properly.
- 32-bit or 64-bit processor from at least 1 GHz
- RAM memory from 1 GB (32-bit) or 2 GB (64-bit)
- Hard disk space of 16 GB (32-bit) or 20 GB (64-bit)
- DirectX 9 graphic device with WDDM 1.0 driver
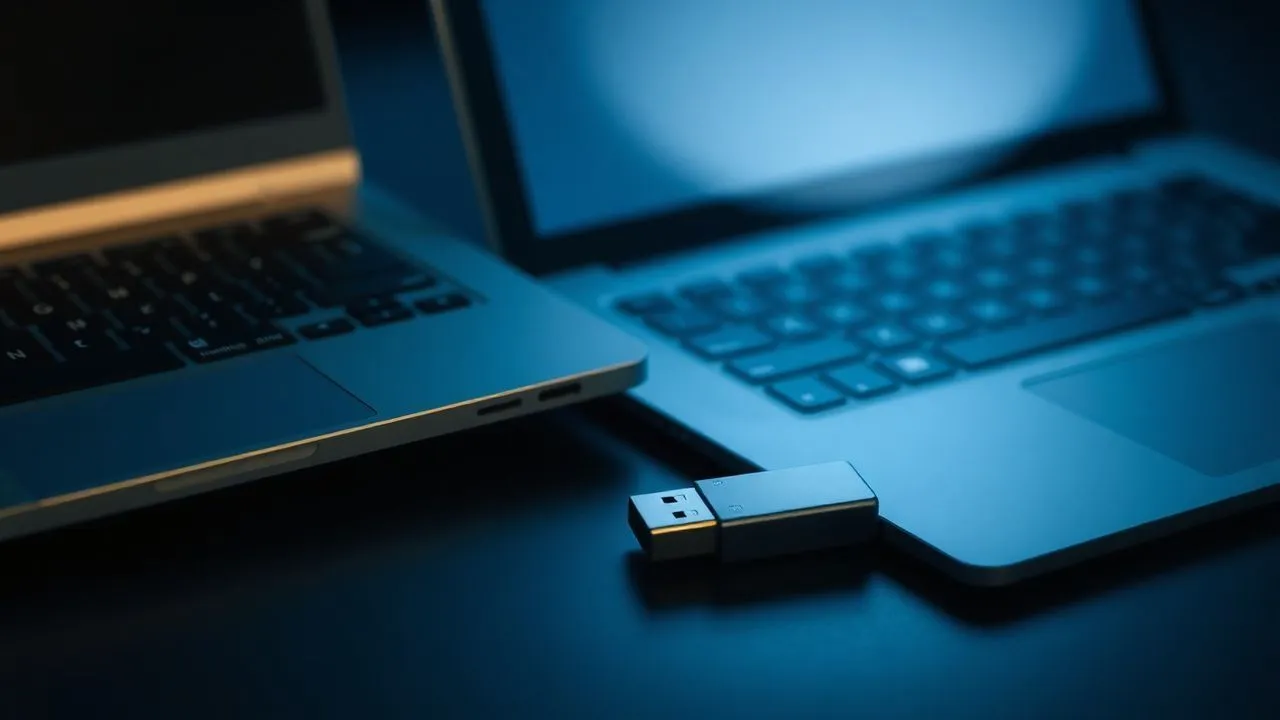
Create bootable USB support with Rufus
Download and configuration of Rufus
To transform your ISO image into a concrete installation tool, you will need a software specialized in creating bootable USB drives. Rufus is undoubtedly the leader in this sector, thanks to its lightness, speed and ability to properly manage old operating systems. In 2026, Rufus continues to receive updates that improve its compatibility with modern partition tables and the latest firmware. After downloading the program from the official website, you will not even have to install it, as it is available in portable version. Insert a USB stick from at least 8 GB in your PC and start the application with administrator privileges to have access to all the functions necessary for writing system files.
Once opened Rufus, the interface will guide you through the selection of the device and ISO file. It is essential to pay attention to formatting options. Windows 7 was designed in a time when it dominated the traditional BIOS system and the MBR partition table. Therefore, if your goal is to install it on an old computer, you will need to select “MBR” as a partition scheme and “BIOS (or UEFI-CSM)” as a destination system. This configuration ensures maximum compatibility and minimizes the risk of errors during the boot phase. Rufus will take care of formatting the NTFS key and copying the necessary files by making the drive capable of booting the computer independently at restart.
ISO writing on key
After you correctly configure all parameters in Rufus, you can proceed with the actual writing of data. By clicking the “Start” button, the program will notify you that all data on the USB stick will be deleted permanently. Make sure you have backed up any important files before confirming the operation. During the process, Rufus will extract the content of the ISO file and configure the key start sector. This operation can take a few minutes to half an hour, depending on the speed of your USB port and the quality of the flash memory used. Avoid disconnecting your device or turning off your computer during this critical phase to not corrupt your system files.
At the end of the procedure, Rufus will show the state “Pronto”. Your USB stick is now a Windows 7 installation support to all effects, ready to be used on any compatible computer. Before proceeding, I suggest you take a look at the content of the key via the Explorer Resources: you should see a series of folders including “boot”, “sources” and the “setup.exe” file. If everything seems correct, you will safely expound the key. This tool will be your passpartout to overcome the obstacle of the missing CD, allowing you to install the system even on ultra-thin laptops or modern desktop PCs that have long removed physical optical readers to save space and costs.
- Download the latest version of Rufus from official website
- Insert a blank USB stick from at least 8 GB
- Select the Windows 7 ISO file via the Select button
- Set partition scheme on MBR for maximum compatibility
Configuration of BIOS and UEFI firmware
Management of Legacy Mode
One of the main obstacles when trying to figure out how to install Windows 7 without CD on computer products after 2020 is firmware management. Modern PCs use UEFI (Unified Extensible Firmware Interface) instead of the old BIOS. Windows 7, however, has limited support for UEFI, especially in its initial boot stages. For this reason, it is often necessary to enter the computer firmware settings and activate what is called “Legacy Mode” or “CSM” (Compatibility Support Module). This function emulates the environment of the old BIOS, allowing dated operating systems to recognize the hardware and properly start the installation procedure from the newly created USB stick.
Access to the BIOS/UEFI is usually done by pressing a specific key (such as F2, F10, F12 or Canc) immediately after ignition of the computer. Once inside, you will need to navigate through the menus, usually under the heading “Boot” or “Advanced”, to find the option related to the boot mode. It is important to note that by activating the Legacy mode, you may no longer be able to start the modern operating system (such as Windows 11) installed on another disk, since the latter requires native UEFI. Don't worry, it's a reversible change that you can change at any time. Once you set the correct mode, make sure you save changes and exit the configuration menu to make the new start settings effective.
Secure Boot Disability
Another crucial element to manage in the firmware is the Secure Boot. This security feature was introduced to prevent unsigned software from running digitally during computer startup. Since Windows 7 has been released much before the capillary diffusion of this technology, it does not have the necessary signatures to be recognized by Secure Boot. If you leave this enabled option, your computer will systematically block any startup attempt from your Windows 7 USB stick, displaying error messages related to security breach. Therefore, you must absolutely locate the “Secure Boot” entry in the firmware settings and set it on “Disabled”.
After you have disabled the Secure Boot and activated the Legacy mode, you have to set the boot order (Boot Order). Move your USB stick to the top of the list, so that your computer searches for system files on the external drive before attempting to boot from the internal hard drive. Alternatively, many computers offer a rapidly accessible “Boot Menu” with a dedicated key, which allows you to choose the boot device for a single session without permanently changing the BIOS settings. Once you complete these steps, your computer will restart and, if everything has been configured correctly, you will see the written “Press any key to boot from USB”, which marks the official start of your adventure with Windows 7.
Windows 7 remains one of the most beloved operating systems in history, but its installation today requires a thorough understanding of the differences between old BIOS systems and the modern UEFI standard.
Installation procedure from USB
Computer start from removable media
Once the BIOS configuration is over, the computer will read the files from the USB stick and load the Windows 7 pre-installation environment. You will see the classic gray loading bar on black background, followed by the colorful logo that accompanied millions of users for over a decade. The first screen you will be presented is the choice of language, time format and keyboard layout. Select the right options for your needs and click on “Next”. At this point, you will find yourself in front of the central button “Installa”. By clicking, the system will start the necessary services to prepare the hard drive to host the new OS files.
At this early stage, the installer will ask you to accept Microsoft software license terms. Read carefully and check the corresponding box to proceed. Immediately afterwards, you will be asked what type of installation to perform: “Update” or “Personalized” (expert users)”. For an optimal and error-free result, I always recommend choosing the custom installation. This will allow you to have total control over disk partitions and perform a complete cleaning, avoiding conflicts with any existing files or operating systems. The clean installation is the guarantee of a snappy and responsive Windows 7 system, just as if the computer had just left the factory.
Disk formatting and partitioning
Partition management is perhaps the most delicate moment of the whole process. On the next screen, you will see a list of hard drives and partitions detected by the system. If you are installing Windows 7 on a disk that previously contained a modern operating system like Windows 10 or 11, you may encounter an error that indicates the impossibility of installing the system on a GPT partition table. Windows 7, in Legacy mode, requires the MBR standard. In this case, you will have to delete all existing partitions on the target disk until you see only “Unlocated Space”. Then click on “New” to allow Windows 7 to create its own compatible partition structure, including the small partition reserved to the system for boot files.
Once you configure disk space, select the main partition and click on “Next”. This will start the actual copy of files from USB stick to internal hard drive. This phase includes several sub-phases: file copying, file expansion, functionality installation and updates. The computer may restart several times during this process; it is absolutely normal and you do not have to intervene. Just make sure that, after the first restart, the computer does not attempt to restart again from the USB stick, but continues running from the hard drive. If necessary, disconnect the USB stick during the first restart to force the boot from the hard drive and complete the final stages of the system configuration.
- Selection of Italian language and keyboard layout
- Acceptance of Microsoft License Agreement
- Custom installation choice for disk cleaning
- Formatting and creating partitions in MBR format
- Completion of user configuration and password
Using a Virtual Machine
Installation via Oracle VirtualBox
If your goal is not to dedicate an entire computer to an outdated operating system, virtualization is the main road. Using software like Oracle VirtualBox allows you to find out how to install Windows 7 without CD and without physical USB, acting entirely through software on your current operating system (both Windows 11, macOS or Linux). After installing VirtualBox, click on “New” and assign a name to the machine. The software is smart and will automatically recognize the system type if you write “Windows 7”. In this mode, you will not need Rufus or modify your real PC BIOS, as VirtualBox creates a fully isolated and secure simulated hardware environment.
The great advantage of this method is that you can point directly to the previously downloaded ISO file. When creating a virtual machine, VirtualBox will ask you to select the ISO file from your hard drive. From that moment on, the software will emulate the presence of a DVD player in which the virtual disk of Windows 7 is inserted. You will follow the same installation procedure described for the physical PC, but with the convenience of being able to take “snapshot” of the system. These allow you to go back in time if something goes wrong or if a virus infects the virtual system, making your tests and navigation extremely safer in the context of 2026.
Configuration of virtual resources
To run Windows 7 smoothly within a virtual machine, you must assign the right hardware resources. I suggest you allocate at least 2 GB of RAM and 2 cores of your CPU to ensure that your system does not slow down during daily use. In the “Schermo” section, it enables 3D acceleration and increases the video memory to the maximum allowed (usually 128 MB or 256 MB); this is essential to properly operate the graphic interface and to avoid annoying visual lag. As for storage, a 40 GB dynamic expansion virtual disk is the ideal choice, since it will occupy space on your real hard drive only as you will actually fill it with programs and files.
Once the installation is completed inside the virtual machine, there is a fundamental step not to forget: the installation of the “Guest Additions” (Add to the guest). It is a package of drivers and utilities provided by VirtualBox that drastically optimizes the performance of the host system. Thanks to them, you can resize your desktop window to your liking, share folders between your real PC and your virtual machine and use your mouse without being “trapped” in the window. This method today represents the smartest and most professional way to manage Windows 7 while protecting your main hardware from the vulnerabilities of an operating system that no longer receives official security patches.
- Create a new virtual machine in VirtualBox
- Alloca at least 2 GB of RAM and 2 core CPU
- Connect ISO image to virtual optical reader
- Install Guest Additions to optimize drivers
Optimization and post-installation security
System driver installation
Once you reach the Windows 7 desktop, you will probably find that many peripherals do not work properly or that the screen resolution is very low. This happens because generic drivers included in the 2009 installation package are not enough to cover modern hardware. If you are using a physical PC, the search for drivers will be your main challenge. You will need to manually search the packets for the chipset, the audio card and, above all, the network card. I suggest you download these files on another computer and transfer them via a USB stick. Be careful: Many manufacturers have removed drivers for Windows 7 from their sites, so you may have to rely on historical third-party archives.
A useful trick to facilitate this operation is the use of “offline” driver packages, such as those offered by well-known driver pack projects. These tools contain immense databases of legacy drivers that can automatically recognize and install the correct components for your system. If you opted for virtualization, as mentioned, Guest Additions will solve 99% of your driver problems in one shot. Always remember to restart the system after every important driver installation to ensure that changes to the system log and binary files are loaded correctly from the Windows 7 kernel during the next boot.
Management of computer risks in 2026
Browsing on the internet with Windows 7 in 2026 is a high-risk activity. Without monthly security updates, the system is vulnerable to known exploits that can be executed simply by visiting a compromised web page or opening a malicious email. If you absolutely need to connect to the network, the first step is to install a modern browser that still supports, somehow, old systems, such as specific versions of Firefox ESR or browser based on Chromium that maintain retrocompatibility. It absolutely avoids the use of Internet Explorer 8 or 11, which are now totally insecure and unable to properly view most modern websites built with current security protocols.
Also, seriously consider installing a third-party firewall and a lightweight but up-to-date antivirus. Although many security software have abandoned Windows 7, there are still solutions dedicated to the industry and legacy that can offer a minimum of protection. However, the best strategy remains that of isolation: use Windows 7 for specific offline tasks and turn off the virtual or physical network card when it is not strictly necessary. Treat this operating system as a specialized tool, a piece of technological antiques that requires special care and attention not to become an entry point for threats in your home or business network.
Security is not a product, but a process, especially when you decide to revive an operating system of the past in a modern and dangerous digital ecosystem.
Frequently asked questions
Can I install Windows 7 on a PC with latest Intel processor?
The installation on modern processors (Intel Core from 10th generation to up) is extremely complex due to the lack of drivers for the USB controller and energy saving management. Although technically possible by integrating custom drivers into ISO, the system may be unstable or present continuous Blue Screen of Death (BSOD). For these hardware, virtualization remains the highly recommended choice compared to native installation.
Is it still legal to use Windows 7 in 2026?
The use of Windows 7 is legal provided that you have a valid license and an original product key. The fact that the support is finished does not make public domain software; copyrights still belong to Microsoft. However, it is no longer possible to buy new official licenses, so you will have to rely on codes that you already own or licensed (retail) that can be legally resold in many markets, including the European Union.
What to do if the USB stick is not recognized when booting?
If the USB stick does not appear in the boot menu, the problem usually lies in the configuration of the Secure Boot or in the creation of the support. Make sure the Secure Boot is disabled in the BIOS. If your PC is very recent and only supports UEFI without Legacy mode, you will need to recreate the wrench with Rufus by setting the partition scheme on “GPT” instead of “MBR”, although this may cause other compatibility issues during the installation of Windows 7.
Can I use Windows 7 for gaming in 2026?
Windows 7 is no longer suitable for modern gaming. Most new titles require DirectX 12, which is not natively supported by Windows 7. Additionally, video card manufacturers such as NVIDIA and AMD stopped releasing updated drivers for this system. You can use it successfully for retrogaming or to play titles released until 2018-2019, but for current games performance and compatibility would be extremely poor.
What are the risks of downloading ISO from unofficial sites?
The main risk is the integration of trojans, ransomware or miners of cryptocurrencies within system files. These threats can act silently in the background from the first start. For this reason, it is essential to verify the integrity of the ISO file through the control of the Hash code (SHA-1 or MD5) and use only renowned sources such as the Internet Archive, avoiding anonymous file-sharing sites or unreliable torrent trackers.
In conclusion, learning how to install Windows 7 without CD is a valuable skill for anyone who takes care of technical assistance or is simply a vintage computer enthusiast. Following the steps outlined in this guide, you will be able to bring this iconic operating system to life in total safety, both on an old hardware and in a modern virtualized environment. Always remember to prioritize your data protection and treat Windows 7 as a legacy environment to be used with extreme caution. If you have correctly followed the instructions on Rufus, BIOS and partitioning, you should now have in front of you the familiar desktop of one of the most successful systems ever. If you still experience problems or want to deepen other technical aspects, do not hesitate to explore our further tutorials dedicated to the optimization of the dated software. Read the full guide to become an expert on Microsoft operating systems and never get unprepared in front of the technological challenges of the future.


