Learning how to make a golem on Minecraft represents one of the fundamental stages for each player who wishes to elevate their level of security within the vast sandbox world created by Mojang. In this 2026, with the evolutions that the game has undergone, the need to protect its villages and its buildings from the night raids of zombies, skeletons and creepers has become even more pressing. Golems are not simple decorative entities, but real tireless guardians with artificial intelligence programmed for territorial defence. Although the basic procedure has remained constant over time, knowing the nuances between the different versions of the game, such as the Java Edition and the Bedrock Edition, is essential to optimize resources and ensure effective protection. In this in-depth guide, we will explore every technical and creative detail necessary to give life to these colossus of iron and snow, also analyzing the possibilities offered by the mods for experimental versions. Whether you are a veteran or a neophyte, understand spawn mechanics, block positioning and material management will allow you to transform your experience in Survival mode into a much safer and rewarding adventure, allowing you to focus on exploration and advanced construction without the constant fear of enemy threats.
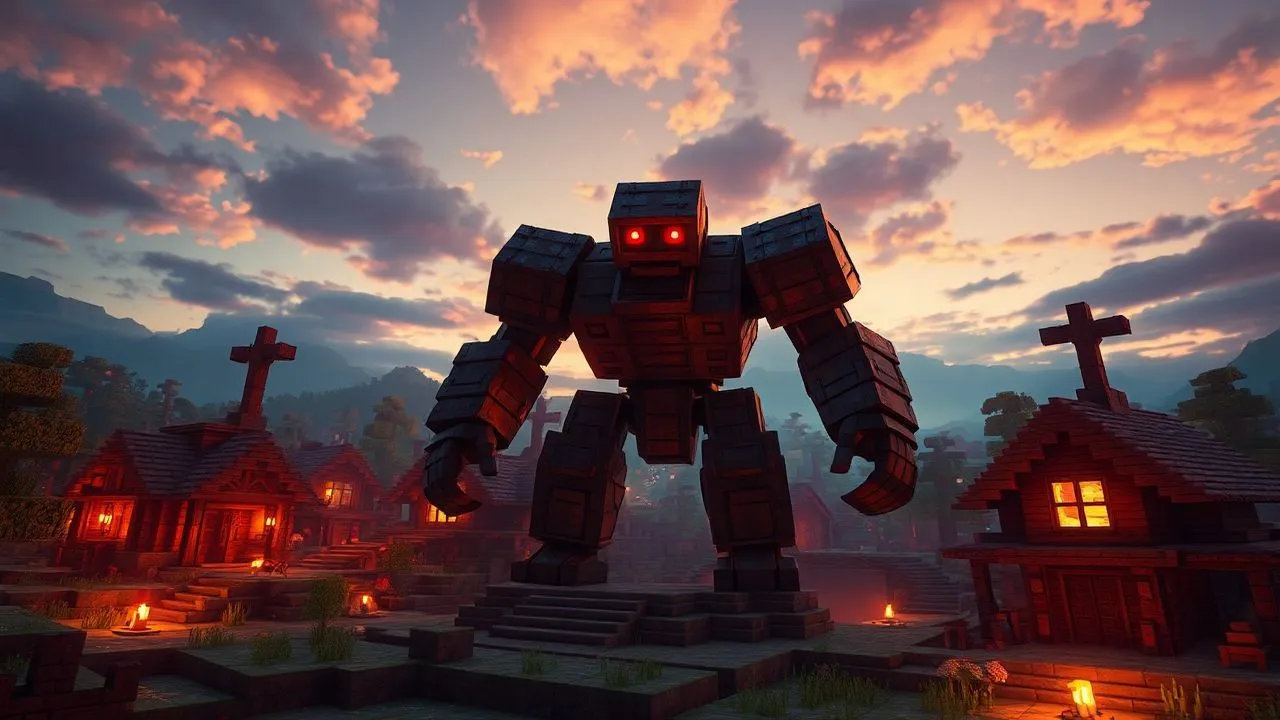
The Iron Golem: The Supreme Guardian of the Village
Requirements and materials necessary for crafting
To understand thoroughly how to make a golem on Minecraft in its most powerful variant, i.e. iron, it is necessary first to focus on the collection of raw materials. Iron Golem is a massive creature that requires a considerable amount of resources, but the benefits it brings far exceed the initial investment. The main component is, of course, the iron ingot. To get it, you will have to venture into the depths of the caves and look for the raw iron ore, recognizable for its brown veins on a grey background. Once extracted with a stone or upper peak, the mineral must be melted into a furnace using a suitable fuel, such as coal or lava. Remember that for a single block of iron nine ingots are necessary; since the golem requires four blocks of iron, you will have to accumulate a total of thirty-six ingots. This process requires patience and an excellent organization of your inventory to avoid losing precious materials during the most intense mining sessions.
In addition to iron, the final element that acts as a “catalizer” for the animation of the creature is the carved pumpkin. Initially, you will find common pumpkins scattered in plain biomes or forests, but to make them suitable for the creation of golem, you will have to use some shears on them. Once carved, the pumpkin will acquire that characteristic lantern appearance that will allow the iron structure to take life. It is interesting to note that, in 2026, the mechanics of agriculture were slightly refined, making the cultivation of pumpkins a very profitable activity not only for the creation of guardians, but also for the trade with the villic. Make sure you always have a stock of pumpkin seeds and a well irrigated soil to never stay without this essential component. The combination of heavy metal and magical agriculture is what makes the procedure how to make a golem on Minecraft a unique experience in the panorama of crafting video games.
Step by step assembly procedure
Once you get the four iron blocks and the carved pumpkin, the physical positioning of the components is the last obstacle between you and your new protector. The structure of the Iron Golem must follow a precise configuration to “T”. Start by placing an iron block on the ground, then place a second exactly above the first. At this point, add an iron block on each side of the upper block, simulating stretched arms. It is essential that the surrounding space is free from obstructions, since the golem needs a minimum physical volume to spawn properly. Many players make the mistake of building the structure too close to low walls or ceilings, preventing the correct materialization of the entity. Make sure that the area is flat and that there are no high grass blocks or flowers that can interfere with the placement of the last piece, which will determine the success of the operation.
The last step to complete the procedure on how to make a golem on Minecraft consists in placing the carved pumpkin above the central block of the upper cross. At the exact moment when the pumpkin is rested, the structure will instantly turn into the Iron Golem. If that doesn't happen, check that the pumpkin is actually “tilled” and not a normal pumpkin, and that the T structure was built correctly without underlying support blocks. Once activated, the golem will immediately start patrolling the surrounding area. Being a neutral creature against the player (if created manually), it will not attack you unless you hit him repeatedly. However, it will be ruthless against any hostile mob that dares to get too close to you or the nearby villics. This mechanic makes it the best ally possible for long-term safety management of your main operating base.
- Four iron blocks arranged in the form of T (total 36 ingots).
- A carved pumpkin positioned as the upper end block.
- Free space around the structure to allow the physical spawn.
- Absence of non-solid blocks that interfere with construction geometry.
- Use of shears on the pumpkin before final placement.
Create a Snow Golem for Long Range Defense
Where to find snow and how to manufacture blocks
If the Iron Golem represents the brute force, the Snow Golem is the unit of light artillery par excellence. Understanding how to make a golem on Minecraft using snow requires a different approach, more oriented to the mobility and control of the territory. To begin, you will need snow blocks, which you get by joining four snowballs in the crafting grid. Snowballs can be easily collected using a shovel on snow layers that are commonly found in cold biomes, such as snowy plains, frozen fir forests or peaks of the highest mountains. In 2026, with the new climate shades introduced in recent updates, the management of snow resources became more dynamic, allowing players to collect snow even during atmospheric rainfall in high-altitude temperate biomes.
The production of a Snow Golem is much less expensive than its metal counterpart, requiring only two snow blocks. This makes it an ideal solution for the initial stages of the game or to quickly create an extended defensive line. However, it is important to remember that the Snow Golem is extremely vulnerable to heat. If you try to build it in a desert biome, jungle or Nether, the creature will suffer immediate dissolution damage until death. Therefore, before you ask how to make a golem on Minecraft of snow, carefully analyze the temperature of the place where you are. These guardians are perfect for ice castles or underground bases where temperature remains constant, ensuring greater longevity and continuous protection against intruders who fear frost.
Tactical advantages of Snow Golem in cold biomes
The tactical utility of the Snow Golem lies in its ability to throw snowballs against enemies at a considerable distance. Although snowballs do not inflict direct damage to most mobs (except Blazes in Nether), they have a strong refusing power (knockback). This means that a group of Snow Golems can keep a zombie horde away or prevent a creeper from getting too close to your walls. In addition, the Snow Golem leaves behind a snow trail wherever you walk, which can be exploited to create an infinite “ snowfarm” within your base. By placing the golem in a tight fence over an ice block, you can continuously collect snowballs that generates under its feet, automating the supply of materials for future constructions.
To maximize the effectiveness of these creatures, many experienced players suggest placing them on high turrets or behind wounders in the walls. In this way, the Golem of Snow can target mobs from above without running the risk of being hit by body-to-body attacks. When planning how to make a golem on Minecraft for defense, it always considers the integration between different types of mob: a Iron Golem on the ground for close combat and several Snow Golem in a raised position for distance support create an almost impenetrable security system. This synergy is the secret to survive the most difficult nights and to effectively protect the markets of villics, which in 2026 became even more central to the gaming economy thanks to the introduction of new rare exchanges.
- Create a shovel using wood, stone or metal.
- Locate a snowy bioma and collect at least 8 snowballs.
- Turn snowballs into 2 snow blocks through the workbench.
- Place the two blocks one above the other vertically.
- Add the carved pumpkin to the top of the snowy column.
Differences between Minecraft Java and Bedrock Edition
Nomenclature of materials and regional variations
One aspect that often confuses those seeking information about how to make a golem on Minecraft is the terminological discrepancy between the two main versions of the game. Although the basic mechanics of crafting are identical, the names of some objects may vary considerably. In the Java Edition, the original version for PC, we often talk about “Pietrisco” (Cobblestone), a fundamental material to create the furnace needed to melt the iron. In the Bedrock Edition, available on consoles, mobile devices and Windows Store, this item is often called “Ciottoli”. These small differences may seem negligible, but are crucial when using console commands or looking for specific recipes in the integrated cookbook, which in 2026 was further expanded to include regional variants of many common blocks.
In addition to the nomenclature, the user interface also has diversity. In the Bedrock Edition, the crafting system is more oriented to the controller and touch screen support, making the golem blocks position a task that requires a slightly different accuracy. However, the fundamental principle of how to make a golem on Minecraft remains universal: the physical structure must be respected regardless of the platform you are playing on. It is also useful to note that the graphic performance of the two versions can affect the golem rendering radius. On the Java Edition, players can enjoy advanced graphics that make golems visually more impressive, while on the Bedrock optimization is focused on frame rate stability, ensuring that your guardians act smoothly even during large-scale battles with dozens of screen entities.
Spawn mechanics and entity limits for version
Another important technical difference concerns the management of the natural spawn of golems within the villages. In the Java Edition, the generation of the Iron Golems is closely tied to the state of “panic” of the villics: when a villic sees a hostile mob, it has a chance to make a golem to defend. In the Bedrock Edition, the mechanics is more based on the number of cellos and beds in a village: once reached a certain population threshold, the game automatically generates an iron protector. Understanding these subtleties is essential if your goal is not only knowing how to make a golem on Minecraft manually, but also how to create an efficient “ironfarm”, exploiting the rules of automatic generation of the game engine in 2026.
There are also different limits regarding the maximum number of entities that can coexist in a restricted area. This parameter, known as “entity cramming”, is very rigid in the Java Edition to avoid server performance drops, while in the Bedrock Edition it is managed more dynamically. If you are planning to create a golem army to protect a massive city, you will have to take into account these limits to prevent your creatures from suffering from choking due to excessive crowding. In summary, the thorough knowledge of the game version used is the first step for a strategic implementation of how to make a golem on Minecraft, ensuring that each resource spends is translated into an effective defensive advantage for your virtual world.
The secret to an inescapable village in 2026 is not only the amount of golems created, but in the deep understanding of the rules of spawn governing the code of the game, allowing a defense that regenerates itself.
The Mystery of Copper Golem and Community Mods
History of vote Mob Vote and Allay
In the course of Minecraft history, not all creatures proposed by developers managed to officially enter the game. An emblematic example is Copper Golem (Golem di Rame), a figure that captured the imagination of thousands of fans during the Minecon Live 2021. Despite the great enthusiasm, this creature lost the vote in favour of Allay, leaving many players with the desire to know how to make a golem on Minecraft using copper, a material that often overflows into our inventories. Copper Golem was thought of as a mob capable of oxidizing over time, changing color from bright orange to green water, and with the particular ability to press copper buttons randomly, introducing a component of unpredictability in redstone circuits.
Although in 2026 Mojang has not officially entered the Copper Golem in the basic version (vanilla) of the game, his myth continues to live through community discussions and numerous online petitions. The beauty of Minecraft lies in this continuous interaction between creators and users: although the official guide on how to make a golem on Minecraft stop at iron and snow, the legacy of the copper golem pushed the developers to make copper an increasingly versatile material for decoration and architecture. Many hope that, in a future update, these mechanical creatures can finally see light as part of an expansion dedicated to archaeology or ancient technology, sectors that are receiving much attention in recent years of title development.
How to install the mods to get the Rame Golem
For those who do not want to wait for an official update, the solution lies in the thriving world of mods for the Java Edition. Thanks to platforms like CurseForge and the use of loaders such as Fabric or Forge, you can download packages that add the Copper Golem to the game with all the features promised originally. These mods not only explain to you how to make a golem on Minecraft with copper, but often introduce aesthetic variants and new interactions with redstone objects. Installing a mod requires you to download the corresponding .jar file and insert it into the “mods” folder of your game directory. It is a process that, although it requires a little more technical expertise than the basic game, opens virtually endless creative horizons for every automation enthusiast.
Once the correct mod is installed, the procedure to create the copper golem usually follows that of its older brothers: they place copper blocks in the form of T (or a single block, depending on the specific mod) and ends with a lightning bolt or a special pumpkin. These creatures add a layer of interesting complexity: you must periodically clean their oxidation with an axe or protect them from lightning to prevent them from turning into real statues. Explore these possibilities in 2026 allows you to understand how much the question about how to make a golem on Minecraft can have different answers depending on whether you choose to stay in the purist experience or embrace the innovations produced by independent programmers worldwide. Copper, often ignored, becomes the core of a new era of virtual robotics.
- Download and install a reliable Mod Loader like Forge or Fabric.
- Visit secure portals like CurseForge to find the "Copper Golem Mod".
- Enter the downloaded file in the mods folder of your Minecraft profile.
- Start the game and collect copper blocks and lightning bolts for crafting.
- Experiment with oxidation to see your golem change appearance over time.
Management and Homeization of Golems in 2026
Use of leash and movement management
After learning how to make a golem on Minecraft, the next challenge is to effectively manage the position of these giants. Golems are not “addomesticable” in the traditional sense of the term, as are wolves or cats; there is no food that convinces them to follow you for love. However, you can use mechanical tools to control their movements. The lead (lead) is the most useful tool for this purpose. Created with four strings (reachable by spiders) and a slimeball ball, the leash allows you to tie a golem and drag it wherever you want. This technique is essential if you have built a golem away from your base and want to escort it to a specific defensive position or inside a fence prepared for the protection of livestock.
Another method to manage movements, especially for the Iron Golems, is the strategic use of the villics. As the Iron Golems tend to stay close to the villages to protect their inhabitants, you can “enge” the artificial intelligence of the golem by placing a villic in a safe area (like a small glazed tower). The golem will remain naturally nearby, acting as a fixed sentry. In 2026, with improvements to mob pathfinding, golems are much smarter in avoiding obstacles or holes in the ground, drastically reducing the risk of being blocked or accidentally falling into ravines during their patrol service. Knowing how to make a golem on Minecraft is just the beginning; knowing how to place it correctly is what defines a real strategist.
Create strategic fences and defense stations
A golem that wanders freely is useful, but a golem strategically positioned is invincible. Creating reinforced fences or “golem nests” is a common practice among the most experienced players. For the Golems of Snow, the ideal is to build small pedestrians surrounded by stone walls or fences, leaving a free space to allow them to throw snowballs. This prevents enemy mobs from getting too close and killing golems with body attacks. For the Iron Golems, instead, it is advisable to create corridors of access to your base that force them to cross the path of any invaders. When designing these structures, remember that the golem occupies a space of about two blocks of width and three of height, then the steps must be adequately spacious.
Moreover, in 2026 it became fundamental to integrate golems with passive defense systems such as lava traps or ditches with sweet berries. A Iron Golem can push enemies to these traps, accelerating the elimination of threats without suffering too much damage. Golem health management is just as important: if you notice that your iron protector starts showing cracks on its surface, it means it has suffered a lot of damage. In this case, you can repair it simply by holding an iron in your hand and interacting with it (right mouse button or action button). This maintenance mechanic ensures that the time spent understanding how to make a golem on Minecraft do not go wasted because of a premature death of your creation during a particularly violent night siege.
Advanced Strategies for Golem Use in Survival
Golem-based automatic iron farms
For players who need huge amounts of metal for colossal construction projects, understanding of how to make a golem on Minecraft transcends simple manual construction to vent in automatic farm engineering. These structures exploit the rules of natural spawn of the game: creating a controlled environment with a specific number of cellos, beds and a constant threat (as a trapped zombie), you can induce the game to continually generate Iron Golem. The golems, once appeared, are transported from water streams to a lava trap that eliminates them, allowing the player to collect the iron bars and the poppies who drop. In 2026, the efficiency of these farms was optimized to work more smoothly even on multiplayer servers with many connected users at the same time.
Although the idea of eliminating golems for their resources may seem cruel, it is a pillar of Minecraft’s advanced economy. Without iron farms, it would be almost impossible to feed complex rail systems or create thousands of hoppers necessary for automatic sorting of objects. A good Content Strategist knows that this is one of the most common researches associated with how to make a golem on Minecraft, since it combines the need for defence with that of industrial production. When you build a farm, make sure you are at least 20 blocks away from other villages or beds not to interfere with the odds of spawn. The millimetre precision in the positioning of water blocks and signs (which hold the lava without burning) is what distinguishes a mediocre farm from a high productivity.
Repair of damaged golems with iron ingots
Not all golems are destined to farms; many become faithful companions to whom players are attached. Repair mechanics is a often neglected but vital detail for the survival of your guardians in Hardcore mode or in Long-Term Survival worlds. As mentioned above, the Iron Golem visually manifests its health status through three levels of damage, represented by increasingly deep cracks on its armor. Each iron ingot used for repair restores about 25 health points (on a total of 100). This process is extremely satisfying and adds a touch of “humanity” to the relationship between the player and his mechanical creation, strengthening the immersion in the game world.
For the Golems of Snow, unfortunately, there is no direct repair mechanics through materials. However, you can protect them by applying them a fire resistance potion if you need to move them through hot areas, or simply by providing them with a rain cover, which is as lethal as the heat for these ice creatures. In 2026, some minor updates introduced the possibility of using honey or other organic materials to slow the erosion of snow blocks under certain conditions, but pumpkin always remains the central element. Learning how to make a golem on Minecraft means therefore accept also the responsibility of their maintenance, transforming you from simple builder to attentive guardian of your defenders, ensuring that peace reigns supreme in your lands for many years to come.
Frequently asked questions
Can I make a golem with gold or diamond blocks?
In the basic game (vanilla) of Minecraft, it is not possible to create golems using gold, diamond, emerald or other precious materials. The only two official variants remain the Iron Golem and the Snow Golem. However, there are numerous mods for the Java version that allow to create golems from almost any existing material, each with unique powers and statistics, but these are not officially supported by Mojang in 2026.
Can the Iron Golem attack the player?
It depends on how it was generated. If you're the one to learn how to make a golem on Minecraft and to build it manually, the creature will be neutral and will never attack you, unless you hit him repeatedly. On the contrary, the golems that spread naturally in the villages protect the villic: if your popularity in the village drops too much because of hostile actions, the golem of the village might consider you a threat and attack you.
What happens if a Snow Golem enters the water?
Water is lethal to the Golems of Snow. Just as the heat of desert biomes and Nether suffers, these creatures suffer rapid damage when they come into contact with water or if they remain exposed to rain. To protect them, it is essential to build sheds or make sure that their defensive positions are completely sheltered from the weather, especially in temperate biomes where it often rains.
How much damage does a Iron Golem inflict?
A Iron Golem is extremely powerful and can inflict between 7 and 21 points (from 3.5 to 10.5 hearts) for each single stroke. Moreover, his attack launches enemies in the air, making them temporarily unable to counterattack and adding fall damage. This combination of pure power and crowd control makes it the most effective defensive entity against almost all hostile mobs of the game.
Why doesn't my iron golem come to life?
If after placing the pumpkin the structure does not transform, it checks three things: first, that the pumpkin is actually carved (use the shears on it); second, that there are no adjacent blocks that touch the “T” of iron (high grass, flowers or snow can interfere); third, that you are placing the pumpkin as the last block. If you used a piston to move the blocks, the golem will not activate properly.
In conclusion, master the technique on how to make a golem on Minecraft is an essential step for anyone who wants to experience a complete and secure gaming experience in 2026. These guardians not only offer unparalleled protection, but also add a level of strategic depth and automation that makes the world of Mojang infinitely more interesting. Always remember to balance the power of iron with the versatility of snow and not be afraid to explore the mods if you want varieties like the legendary Copper Golem. Now that you have all the information you need, you just have to collect your materials, hold the picket and start building your own army. If this guide has been helpful, we invite you to discover our other advanced tutorials to become a real Minecraft expert!


