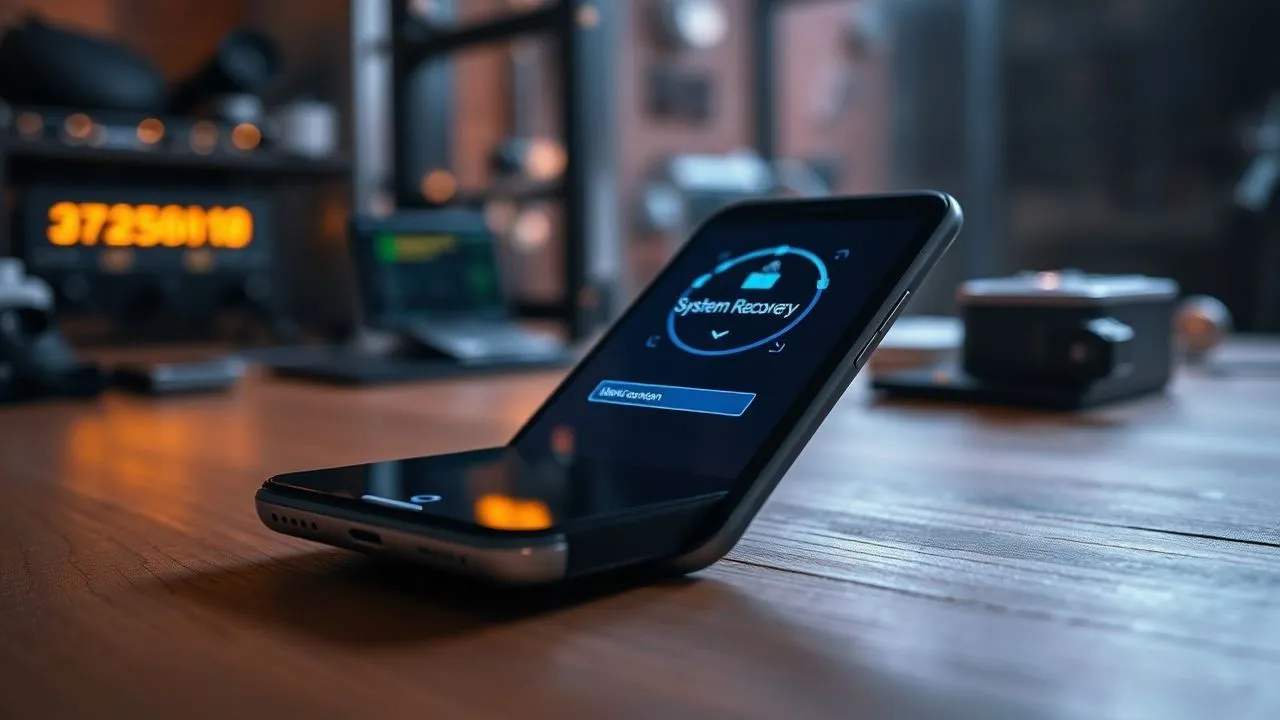
In this month of April 2026, the panorama of smartphone updates has become extremely dynamic, but not always the new system releases guarantee the hoped stability. If you are in a situation where your device, following the installation of the latest release of Android, began to show dramatic slowdowns, abnormal overheating or incompatibility with your essential work applications, you'll probably be wondering how to return to the previous version of Android. Performing the operating system downgrade is not a trivial operation like simply installing an app, but requires a deep understanding of system partitions, bootloader operation and advanced security procedures. In this senior technical guide, we will analyze every single step necessary to bring your smartphone or tablet back to a more performing previous state, carefully evaluating the risks and opportunities that this procedure entails. Most often, manufacturers push users towards the latest versions for security reasons, but user freedom to manage their hardware remains a key pillar of the Android ecosystem. We will then see how to move between custom recovery, firmware image file and debug tools to regain full control of your device, ensuring that we preserve the integrity of your data and functionality of the most delicate hardware components.
Preliminary information and system downgrade risks
Technical Glossary for surfing Android modding
Before immersing ourselves in practice, it is essential to master the terminology you will encounter during the downgrade process. The Bootloader is the first software that runs on startup and decides whether to load the operating system or enter recovery mode; unlocking it is the precondition for each operation, but remembers that in 2026 European regulations have made this practice more complex to protect the security of biometric data. The ROM, in the Android jargon, it represents the complete image of the operating system: it can be “stock” if provided by the manufacturer, or “custom” if developed by third parties like LineageOS or Pixel Experience. Other key element is the Recovery, an independent software environment from Android that allows to manipulate memory partitions. A custom recovery (such as the TWRP) replaces the factory one to allow the installation of packages not digitally signed by the original manufacturer. Finally, terms such as Flash indicate the writing act of the software in non-volatile memory, while the fear Brick refers to a critical error that prevents the ignition of the device, distinguishable in “soft brick” (resolvable via software) and “hard brick” (which requires specialized hardware assistance).
Risk assessment and warranty validity
Proceeding with Android downgrade is an action that involves real risks that should not be underestimated, especially with modern hardware architectures. When you decide to force a previous version of the firmware, you are essentially overtaking security controls that prevent rollback, a measure implemented to prevent malicious install older versions with known vulnerabilities.
The downgrade almost always invalidates the manufacturer's conventional warranty, as the bootloader unlocking leaves an indelible track in the security logs (such as the Knox counter for Samsung).
Furthermore, there is a possibility to permanently lose DRM cryptographic keys (such as Widevine L1), which would prevent high definition content from viewing on platforms such as Netflix or Disney+. Although the procedure may seem like a quick bug solution, it is good to address it only if you have an integral backup copy and if you are aware that a error during the firmware flash can make your smartphone unusable. Our responsibility is to provide you with the knowledge tools, but material execution remains under your total supervision and technical responsibility.
Device preparation and full data backup
The crucial importance of a backup in 2026
Starting a downgrade procedure without having secured your data is the fastest way to deal with a digital disaster. Since the bootloader unlocking and the next firmware flash will erase every single bit on the internal memory, you need to set up a multi-level backup system. Do not limit yourself to Google's cloud: in 2026, the amount of data generated between high resolution photos and local documents requires a more structured approach. Use tools like Google One for settings and contacts, but also carry out a manual transfer of critical folders such as WhatsApp, Telegram and the DCIM folder on an external physical support or a home NAS. Make sure that your two-factor authentication apps (2FA) have been migrated or that you have backup codes, since once you format your phone, you will no longer be able to access your accounts if you have not correctly configured these security systems. Data loss is the only certain damage of downgrade, so it devotes at least an hour to verify that each important file has been duplicated correctly elsewhere.
Required hardware and software requirements
To operate safely, your PC must be configured correctly and the mobile device must be ready for operation. Make sure you have an original USB cable or high-speed certificate; poor quality cables are the main cause of interruptions while transferring firmware, resulting in brick phone. The battery of your Android device should be charged at least 80% to avoid sudden shutdowns during memory writing stages, which are high energy consumption. Computer side, it is essential to install ADB (Android Debug Bridge) and Fastboot drivers updated to the current version of 2026, ensuring that the operating system (both Windows 11 or Windows 12) correctly recognizes the device when connected in debug mode. Another fundamental shortness is to temporarily disable any antivirus or firewalls that could interfere with USB ports during communication with the bootloader, ensuring a clean, unobstructed data transmission line that could corrupt the sent packages.
Bootloader unlocking and ADB configuration
Enable Developer Options and USB Debug
The communication bridge between your computer and your smartphone is represented by the debug settings, which must be manually unlocked. To do so, open the Android Settings, navigate to the Device Information section and locate the Build Number item. You have to touch this voice seven consecutive times until a pop-up confirms that you are a programmer. At this point, returning to the main menu and accessing System > Developer Options, you will have to activate two critical switches: OEM Unlock e USB Debug. The OEM unlock allows the system to accept commands for bootloader opening, while the USB Debug enables the sending of commands via ADB. When you connect your phone to your PC after this operation, a request for authorization will appear on your smartphone screen with your computer's RSA fingerprint: always select Allow from this computer to establish a stable and secure connection for later downgrade steps.
Fastboot controls for permanent unlocking
Once the debug is configured, you need to restart the device in Fastboot or Bootloader mode. You can do this by pressing a combination of physical keys (usually Volume Down + Power) during ignition, or by typing the command reboot bootloader in the terminal of your PC (PowerShell or CMD). Once the device shows a static screen, often with a stylized Android robot, you can check the connection with the command fastboot devices. If the serial appears correctly, the final command to proceed is fastboot flashing unlock (sing) fastboot oem unlock on the most dated models). You will be asked for a physical confirmation on your device: use the volume keys to select the unlock option and the Power button to confirm. Remember that at this precise moment the device will perform a total restoration to factory data for security reasons, eliminating any encrypted data previously to protect your privacy from unauthorized access to the file system.
Installing Recovery and choosing Firmware
Install TWRP or equivalent Recovery
With the unlocked bootloader, the device is now ready to receive a new recovery system. The TWRP (Team Win Recovery Project) remains the standard choice in 2026 for its flexibility and intuitive touch interface. You need to download the image file (.img) specific for your exact model and variant of smartphone; using an incorrect file will lead to a boot error. To install it, restart again in Fastboot mode and type fastboot flash recovery filename. img. If your device uses architecture with A/B partition, you may need to use the command fastboot boot filename. img and then install recovery permanently from within the TWRP interface itself. Once installed, this recovery will allow you to manage partitions, back up “nandroid” (exact copies of the entire system) and, more importantly, install the .zip file of the previous Android version you want to restore on your hardware.
Where to find and how to choose the correct firmware
The search for the previous firmware is a delicate step. Manufacturers rarely offer a public archive of old versions, so you need to rely on reliable databases. For Google Pixel devices, you can download Factory Images officers directly from Mountain View servers, ensuring maximum security. For Samsung devices, tools such as SamFirm or Frija allow you to download the original firmware packages by entering the model code and the CSC (Country Specific Code). If you point to a Custom ROM that simulates a previous version, bring them as XDA Developers are the reference point to find community-optimized software. Always check the integrity of the file via MD5 or SHA-256 control after download, to make sure the package is not corrupt. A corrupt system file is the main cause of bootloop, a situation where the phone continues to reboot endlessly without ever loading the user interface.
Practical execution of Android Downgrade
Flashing procedure via Recovery or Official Tools
There are two main roads to write the old operating system in the memory of the device. The first includes the use of an official PC tool: for example, the Google Flash Tool for Pixels or Odin for Samsung. These programs manage low-level communication and write individual partitions (Boot, System, Vendor, Data) sequentially. If you use a Custom Recovery, you will need to copy the .zip firmware file (and any Google Apps or GApps packages) to your internal memory or to an SD card. From the TWRP screen, select Install, choose the package and drag the slider to start the process. During the flash, you will see a series of text strings that indicate the progress of overwriting existing partitions. It is essential not to touch the device and not to disconnect cables until the successfully completed operation message appears, to avoid fatal corruptions of the file system.
Post-flash operations and first start
After you have completed the installation of the software, you can’t restart normally yet. Since the latest version of Android data is incompatible with the previous one, you must perform a Wipe Data/Factory Reset directly from recovery. This operation will clean Dalvik caches and user data partition, preparing a virgin environment for the old system. Once done, select Reboot System. The first start after a downgrade is notoriously long: the system must rebuild app databases, initialize system services and configure hardware. It may take 5 to 15 minutes; do not panic if you see the boot animation repeat for a long time. If after 20 minutes the phone has not yet turned on, you may be encapsulated in a bootloop, which would require you to repeat the wipe procedure or verify compatibility of the firmware version used.
Alternatives to downgrade and application management
Restore factory data as a bug solution
Before embarking on the complex downgrade road, it is worth considering the factory state restoration of the current version. Many times, the problems encountered after an update are not due to intrinsic bugs of the new Android, but to configuration residues of the previous version that create software conflicts. Make a Hard Reset completely cleans the system and allows the new version of turn “clean based”, often solving frame rate, battery drain and app crash. You can do this from Settings > System > Recovery Options > Delete all data. If after a total recovery the phone continues to present the same macroscopic problems, then you will have the confirmation that the current firmware is actually poorly optimized for your hardware and that downgrade is the only way to recover the usability of your smartphone.
Back to the previous version of single apps or Android Auto
If your discomfort is caused by a single application or a specific malfunction of Android Auto, you do not need to change the entire operating system. Android allows you to install previous versions of apps via APK files. To do so, you must first uninstall the updated app (or disable updates if it is a system app), enable the installation from unknown origins in the security settings and then manually install the APK file of the desired version taken from secure sites like APKMirror. As regards Android Auto, the problems of connection with the car’s infotainment are common after updates. In this case, you can search for the previous version of Google Play Services or Android Auto app itself, which often solves compatibility issues of USB or wireless communication protocol. But remember to turn off automatic updates in the Play Store, otherwise Google will restore the latest bugged version within a few hours, canceling your manual work.
- Physical backup: Always copy your data on a support not connected to the network before you start.
- Firmware compatibility: Check the exact model code (e.g. SM-G991B) to avoid brick.
- Battery Status: Never start if the charge is less than 60-80%.
- Driver PC: Keep ADB and Fastboot drivers up to date to avoid communication errors.
- Enable Developer Options on your Android smartphone.
- Unlock the Bootloader by following the specific procedure of your manufacturer.
- Install a Custom Recovery like the TWRP to manage file flashing.
- Download and install the firmware of the previous version you want.
- Perform a complete wipe of data to avoid conflicts between different versions.
Frequently asked questions (FAQ)
Does Android Downgrade delete all my files?
Yes, the downgrade process requires the total deletion of internal memory. This happens both during bootloader unlocking, which is a security measure to protect your data from unauthorized access, and during the previous firmware flash, since system databases of a newer version are not readable by an older version. It is essential to make a full backup on PC or cloud before starting.
Can I return to Android 14 if I installed Android 16?
Technically it is possible, but it depends a lot on the manufacturer's device and policies. Some brands implement a mechanism called “Anti-Rollback”, which prevents the installation of firmware with a lower security level than the current one. Before proceeding, it is essential to check on specialized forums if your specific model allows the backward jump between versions so distant or if the bootloader will block the operation for reasons of integrity.
What if the phone turns off during the downgrade?
If the device turns off while writing data in system partitions, you risk a hard brick. In this situation, the phone may not turn on anymore and not be recognized even by the PC in Fastboot mode. For this reason it is imperative to have battery charge and use high quality USB cables. In case of accidental shutdown, you may need EDL (Emergency Download Mode) recovery tools or professional technical assistance.
Is the manufacturer's warranty permanently invalidated?
In most cases, bootloader unlocking invalidates hardware warranty. Some manufacturers are more permissive, but many integrate security chips that record the unblocking in an irreversible way. Even if you decide to re-lock the bootloader later, the security counter will show that the system has been tampered. If your smartphone is still covered by warranty and has software problems, it is advisable to contact official assistance first rather than proceed independently.
Why can’t I find the OEM Unlock option in the settings?
The absence of the OEM Unlock item can depend on several factors. In some cases, the device must be connected to the Internet for a number of hours or days before the option appears (as happens on some Samsung models). In other cases, the smartphone could be bound by a telephone operator who deliberately removed the ability to unlock the bootloader. Always check if your specific model is an unlockable variant or if it has regional or operator restrictions.
In conclusion, learning how to return to the previous version of Android is an advanced competence that allows you to escape the limitations of unenhanced updates or rich in bugs. Although the procedure requires careful attention to detail and a good dose of patience, the final result pays off the effort: a smooth, stable and perfectly responsive device to your daily needs. Always remember to proceed with caution, consulting the specific resources for your model and keeping your backups always up to date. If you have correctly followed each step of our guide, your smartphone should now run the Android version you prefer. Do not forget to monitor the new software releases in the future, carefully evaluating community reviews before proceeding to a new system update. Good continuation with your regenerated Android device!


