In the editorial panorama of 2026, the ability to transform a simple manuscript into a ready volume for printing has become a fundamental competence for each independent author. Understanding how to imply a book not only concerns the aesthetic layout of words on the page, but involves a series of technical choices that directly influence the reading experience and the perception of professionalism of your work. Often, after finishing the tiring phase of writing, we collide with the technical reality of library production: margins, profiles, page numbering and chapter management can seem insurmountable obstacles for those who are not familiar with desktop publishing software. However, thanks to the technological evolution of recent years, accessible tools such as Word, InDesign and Pages have made the process of professional layout manuscript much more intuitive than the past. In this detailed guide, we will explore every single step necessary to give impeccable shape to your thoughts, analyzing the optimal settings for offset and digital printing, the parameters required by the main self-publishing services and typographical rules that distinguish amateur work from a high-level editorial product. Whether you are preparing a novel, a technical essay or a collection of poems, you will learn to master the book formatting for printing without necessarily having to invest high figures in external services, maintaining full creative control over your publication.
Software to engage books and professional tools
The choice of the ideal program in 2026
The selection of best software to impact books largely depends on the complexity of your editorial project and your level of technical expertise. In 2026, the market offers solutions ranging from advanced word processors to purely professional imaging software. If your goal is to produce a narrative-only novel, tools such as Microsoft Word or LibreOffice Writer are more than enough, as they offer excellent management of text streams and paragraph styles. These programs have implemented artificial intelligence functions that help prevent common spatial errors and help in organizing the hierarchical structure of the manuscript. On the contrary, if you are working on an illustrated book, a technical manual full of tables or a photographic volume, the choice must necessarily fall on Adobe InDesign or Affinity Publisher, which guarantee a millimeter control over each graphic element and a superior color management for professional printing.
Another crucial aspect concerns the compatibility of the files produced with the systems of the press centers. While videowriting programs export files that may be subject to slight variations depending on the software version, desktop publishing applications generate standardized PDF/X, which are the standard in the current typographic industry. There are also cloud-based platforms that allow real-time collaboration between author and editor, facilitating the review phase and book formatting for printing integratedly. Carefully evaluate your budget, as while some software require a monthly subscription, others are licensed open source or one-time purchase. The initial decision will affect the entire production workflow, so it is essential to test the different options through trial versions before engaging in a long-term project that could take months of work.
Technical requirements and editorial layout parameters
Before starting any practical operation, it is necessary to define the parameters editorial layout that will guide the construction of the volume. Each typography or distribution service requires precise specifications concerning paper size, text cage and security margins. Usually, the most common formats for the narrative range from the classic 13×20 cm to the most modern 15×23 cm. Defining these dimensions at the beginning of the process is vital to avoid having to reformat the whole document at a later time, which could cause unwanted shifts of rows and page breaks. In addition to external dimensions, it is necessary to consider the binding margin (gutter), that is the extra space necessary on the inside of the page to allow easy reading of the text once the book has been glued or sewn.
The importance of choosing fonts cannot be underestimated in professional layout manuscript. In 2026, the trend is towards using extremely legible (serif) characters, such as Garamond, Minion Pro or Palatine, which reduce visual fatigue during prolonged reading sessions. The font size should range between 10 and 12 points, with a generous interline that allows the eye to slip easily from one line to another. It is essential to correctly set widows and orphans, i.e. those isolated rows that appear at the beginning or end of a page, to ensure a harmonious aesthetic continuity. Remember that consistency is the key to success: each chapter must start with the same style, and the hierarchy of titles must be kept strictly throughout the volume to drive the reader without generating visual confusion.
- Choice of physical format (e.g. 15×21 cm or A5).
- Definition of internal and external margins (minimum 2 cm).
- Selection of a readable serif font for the text body.
- Set the automatic numbering of pages.
- Correct management of paragraph styles and titles.
How to create a book with Word professionally
Document and margin setting
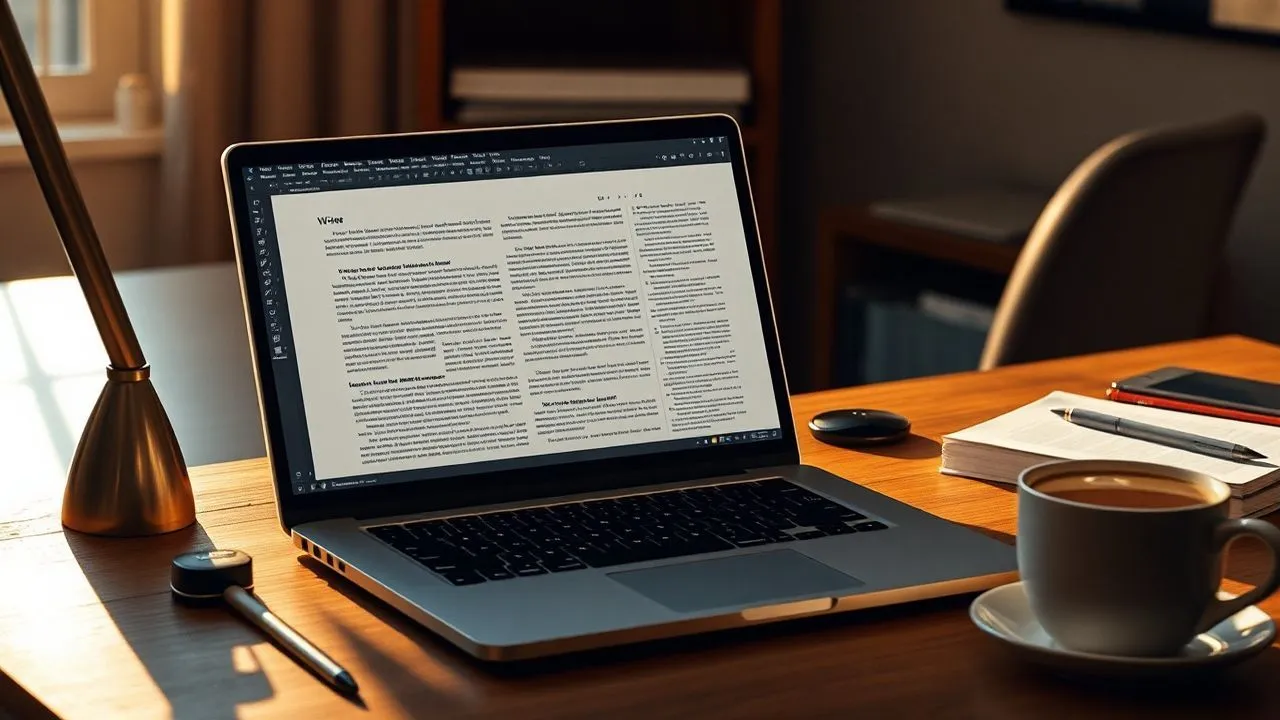
Many authors often wonder how to create a book with Word getting a result that doesn’t look like a simple office document. The secret lies in the correct initial configuration of the Layout tab. Instead of using the default settings, you need to access the Set page window and select the Margin specular option. This function is fundamental because it allows to differentiate the margins of the pages from the left ones, ensuring that the internal space for the binding is identical throughout the volume. At this stage, you also need to set the custom paper size according to the final size of your book. If you expect to print a book of about 300 pages, an internal margin of at least 2.5 cm is strongly recommended to prevent the text ending in the central “piega”, making reading difficult and unpleasant.
In addition to margins, section management is the element that makes the difference between an amateur and a Word expert. Using section breaks (following page), you can create parts of the book with different formats. For example, the initial pages (frontespizio, colophon, index) usually do not present the numbering or use the Roman numeration, while the text body begins with the Arabic numeration starting from the first chapter. This flexibility allows you to insert blank pages where necessary, ensuring that every new chapter always starts on the right page (different page), which is a consolidated editorial convention. Through the wise use of Word styles, you can also generate an automatic summary that instantly updates to every text change, saving manual hours and drastically reducing the risk of errors in page numbers references.
Use of advanced styles and typography
For one professional layout manuscript on Word, use of styles is absolutely mandatory. Do not limit yourself to manually changing the font or the size of a single paragraph; instead create styles specific to the “text frame”, the “Titles of chapters” and the “Citations”. This approach ensures that every global change takes place with just one click. For example, if you decide that the font you choose initially doesn’t suit you anymore, you will just change the style “ Text Court” and the whole manuscript will be updated instantly. In 2026, Word also perfected automatic syllable management, which must be activated to avoid the annoying “fiumi” of white spaces within the justified paragraphs. A correct justification, combined with rigorous control of the spaces between words, gives the page a compact and elegant look, typical of books published by large publishing houses.
Another detail that is often overlooked is the management of headers and footers. In a book that is properly impounded, it is common to find the author’s name on the left page and the title of the book on the right page. With Microsoft Word, you can get this result by activating the Different option for even and odd pages in the header settings. This level of customization is what transforms a digital file into a real editorial object. Also remember to disable the numbering on the first page of each chapter, since aesthetically it is much cleaner to let the numbering actually start from the second page of the chapter itself. These small shortcomings, although they require some extra time in the configuration phase, greatly elevate the quality of the final product and communicate to the reader a sense of care and attention to detail that will not go unnoticed.
Adobe InDesign Guide for authors and designers
Structure of master pages and numbering
If you want total control over your work, the adobe InDesign guide for authors is the starting point for accessing the world of professional desktop publishing. Unlike Word, InDesign reasons for “objects” and text frames, allowing you to position each element with surgical precision. The heart of the program is the Master Pages (Master Pages), which act as models for the whole document. Within the master, you can define the exact location of page numbers, current titles and any recurring graphic elements. Once the master is set, each new page added to the document will automatically inherit these features. This system is particularly powerful because it allows you to create different types of master: one for the chapter pages, one for the standard text pages and one for the illustrated sections, but maintaining a basic structural consistency.
The professional layout also requires an oculated management of text flows. InDesign allows to “concatenate” text frames between different pages, so that the content flows smoothly from one facade to another. If you insert an image or a quote that moves the text, the entire manuscript will be automatically placed respecting the established links. InDesign's composition engine is infinitely higher than the common word processors: it analyzes the entire paragraph to decide where to insert line breaks, optimizing font density and minimizing the need for forced syllables. This technology, combined with the possibility of using OpenType fonts with special ligatures and glifi, allows to obtain a typographical quality indistinguishable from that of the luxury editions of major international publishing houses.
Text import and color management
A common mistake for those who start is trying to write the book directly into InDesign. The correct procedure, however, provides for the drafting of the text in an external editor and subsequent import via the Enter command. During this phase, you can decide to maintain or remove the original formatting, mapping Word styles on those previously created in InDesign. This method is extremely efficient because it allows you to focus on writing without distractions, devoting the final phase exclusively to book formatting for printing. InDesign also manages footnotes and closing notes flawlessly, allowing a complete aesthetic customization that goes well beyond the standard options offered by less-developed programs, including management of analytical indexes and complex bibliography.
Finally, color management and print profiles represent the true added value of this software. In 2026, digital printing requires CMYK color profiles specific to each type of paper (patinata, hand use, recycled). InDesign warns you immediately if an image has too low resolution for printing or if a chosen color is not reproduced faithfully by typographic inks. When exporting to PDF, you can include cutting marks and abundances (bleed), essential elements so that the printer can trim the book without risking cutting parts of the text or leaving unpleasant white edges. Mastering these technical settings means ensuring that what you see on your monitor corresponds exactly to what you will receive at home in the form of a paper book, eliminating bad surprises and wastes of money due to unconformed files.
- Creation of the document with flanked pages and custom margins.
- Setting the Master Pages for numbering and headings.
- Importing the manuscript from .docx or .rtf files.
- Application of character and paragraph styles.
- Export PDF/X-1a or PDF/X-4 for printing.
Free solutions: OpenOffice and LibreOffice for Writers
Writer Configuration for publishing
Not all authors have the opportunity to invest in expensive software subscriptions, and this is where open source suites come into play. If you are looking for a way on how to engage a book without licensing fees, LibreOffice Writer represents the most solid and updated choice in 2026. While free, it offers very advanced layout tools that nothing has to envy to previous versions of commercial software. To start, you need to configure the Page Style by going to the Format menu. Here you can define the “Respect” layout and set the necessary margins. A strong point of LibreOffice is the intuitive management of frames, which allows you to insert images or text boxes with a very precise wrap control (text run), ideal for manuals or books of essays that require a basic iconographic apparatus.
The numbering of the pages in LibreOffice may initially seem complex, but once the mechanism of the “Camp Commands” becomes a powerful ally. You can insert the page number in the footer and format it so that it appears aligned left on the pages equal and right on the odd pages, exactly as in professional books. In addition, the software allows direct export to PDF format, including the necessary tags for accessibility and internal navigation. For those who write long works, the “Navigator” function allows you to move quickly between chapters, making the book formatting for printing a smooth and less frustrating process. Thanks to the community's constant support, LibreOffice continues to improve its performance, offering today a stability that makes it perfect for managing manuscripts of hundreds of thousands of words without significant slowdowns in the system.
Benefits of open format in layout
The use of free software such as OpenOffice or LibreOffice is not only an economic choice, but also a philosophy of digital freedom. Files saved in .odt format are international standards that guarantee the readability of your work even in decades, unlike some proprietary formats that could become obsolete. This is a critical aspect for an author who wants to preserve his digital archive. In addition, these programs allow extreme customization through extensions: there are specific plugins for writers that help in the management of bibliography, advanced spell control and even in the generation of eBook in ePub 3 format directly from the impaginate document. This versatility makes open source suites a complete tool throughout the life cycle of a book, from the first draft to the final publication.
Another advantage lies in the lightness of the software: LibreOffice Writer can also turn quickly on non-relative computers, allowing anyone to try in the book formatting for printing without having to purchase latest hardware. The management of character styles is particularly granular, allowing to accurately define the appearance of lanes, bold and apics without interfering with the general structure of the paragraph. Although the interface may appear less modern than Adobe InDesign, functional logic is solid and allows you to get ready-to-print PDFs that exceed quality controls of most self-publishing services. Choosing these solutions means investing time in learning a versatile tool that will always remain at your disposal, without monthly fees or restrictions of use.
The imagination is the silent art of making the text invisible, letting history speak directly to the soul of the reader without visual distractions.
Amazon KDP publication paper: requirements and formatting
Adapting the layout for Kindle Direct Publishing
The publication Amazon KDP paper revolutionized the way independent authors distribute their works. However, to get a book that doesn’t seem “homemade”, you need to stick to very strict criteria. Amazon offers preformed (template) models, but it is often better to build your own file from scratch to have total creative control. One of the most critical aspects is the management of abundance (bleed). If your book contains images that come to the edge of the page, you must add 0.3 cm to each side of the document. This extra space will be cut during production, ensuring that the image perfectly covers the entire surface without leaving thin white lines unsightly on the edges.
Another vital element for success on Amazon KDP is the calculation of the thickness of the coast. This depends exclusively on the number of pages and the type of paper chosen (white or cream). Amazon provides online computers that tell you exactly how many millimeters the cover plug should be wide. Inside the book, instead, you must ensure that there are no important elements too close to the outside edges, to avoid being cut or that they are too close to the reader’s thumb while browsing the volume. I self-publishing systems 2026 have become extremely sophisticated, offering digital previews that simulate the physical book. It is essential to use these tools to control each single page before giving the free way to the press, paying particular attention to the resolution of images, which must be taxively of 300 DPIs to avoid gears or pixelated effects.
Using Kindle Create for Complex Works
For those who find the traditional layout too complex, Amazon offers free Kindle Create, a software designed specifically to guide the author in book formatting for printing and digital simultaneously. This tool allows you to import a Word file and apply predefined professional styles with just one click. It is particularly useful for simple narrative and essays, since it automatically manages the creation of decorative capilettera, the formatting of chapter titles and the insertion of graphic elements dividers between paragraphs. In 2026, Kindle Create introduced advanced features for managing tables and interactive content for the eBook version, but maintaining an impeccable static version for paper format, thus ensuring a perfect consistency between the various sales formats.
However, one must be aware of the limits: Kindle Create does not offer the same freedom as InDesign or Word regarding custom margins or complex typographical grids. It is an ideal solution for those who want to publish quickly without studying typography techniques. If your goal is to create a unique editorial work, the advice is to follow the path of manual engagement on professional software, then exporting a ready-to-use PDF. Regardless of the chosen tool, remember that Amazon performs automatic control of the file at the time of loading, reporting any unincorporated margin or font problems. Solving these errors before loading will save you valuable time and ensure that your work is approved and sold as soon as possible.
- Check the number of pages for the calculation of the cover coast.
- Set the abundance (bleed) for all-page images.
- Control of image resolution at 300 DPI minimum.
- Use of fonts embedded in PDF to avoid unwanted replacements.
- Final review through Amazon KDP online preview.
Beauty Tips and Golden Rules of Librarian Impagination
The importance of readability and white spaces
Often we think that how to imply a book means filling every space available with the text, but the editorial reality is the exact opposite. White space is as important as the words themselves. A too dense page rejects the reader, transmitting a feeling of oppression and fatigue. Professional publishing houses use generous margins not only for technical issues, but to give “respyro” to reading. The upper margin has to accommodate the headers, while the lower one has to leave space to the page number without this appear falling out of the sheet. A trick of the craft is to use the golden section to define the cage of the text, creating a visual balance that the human eye perceives naturally as harmonious and restful.
The choice of justification must also be made with awareness. Although most books are justified, in some contexts (such as poetry or certain types of modern essays) flag alignment (left) can be more appropriate and facilitate fast reading. In case of justification, it is essential to adjust the spacing settings between characters (tracking) and between words (kerning) to avoid creating white holes within phrases. In 2026, the new typographic rendering engines allow a millimeter management of these parameters, ensuring that each row has a uniform visual density. Pay attention also to the “line length”: an ideal line for reading should contain between 55 and 70 characters. Too long rows tire the eye, while too short rows overly break the rhythm of the narrative.
Management of chapters and special characters
Each new chapter represents a new beginning and as such must be celebrated visually. In professional layout manuscript, it is customary to start the chapter about a third or half of the page, leaving a large white space above the title. The title of the chapter must have a body greater than the text and can be accompanied by a number or a graph frieze. The first line of the chapter usually does not have the indent (indent), while all subsequent rows starting a new paragraph should have a small return of about 0.5 cm. This helps the reader to immediately identify changes in thought or scene without having to insert blank lines between one paragraph and the other, which is typical of web and corporate documents, but not books.
Finally, do not neglect special characters. The quotes must be those “high” or “caporali” (« ») depending on the editorial style chosen, and must be consistent throughout the book. Long strokes (—) should be used for engraved or dialogues, distinguishing them clearly from short strokes (-) used for composite words. These details may seem insignificant, but these are the ones that distinguish a book carefully printed by an amateur draft. In 2026, many authors use automatic scripts to clean the text from double spaces, incorrect punctuation and other typographical refutes before proceeding to final layout. A deep cleaning of the manuscript is the fundamental requirement for a book formatting for printing that can compete with international bestsellers on the shelves of physical and digital libraries.
Frequently asked questions
What is the difference between margin and abundance?
The margin is the white space between the text and the edge of the page, necessary for readability and binding. The abundance (or bleed), on the other hand, is an extra space of about 3 mm above the edge of the sheet, required only if there are images or graphics that must arrive exactly at the edge of the paper cut, to avoid unwanted white edges.
Can I use free fonts for my book?
Of course, but make sure that the license allows commercial use and incorporation into PDF. Many fonts downloaded online are free only for personal use. For a professional layout, we recommend using high-quality open source fonts such as those available on Google Fonts (eg. Crimson Text or Playfair Display) or standard system fonts such as Garamond.
How big is the font in a novel?
Typically, for a standard novel, the ideal font size ranges between 10 and 12 points. Much depends on the type of character chosen: some fonts appear larger than others at equal points. The objective is to ensure a smooth reading without having to excessively enlarge the number of pages in the book, which would increase the printing costs.
Do you need to enter the numbering on each page?
Yes, the numbering is essential to allow the reader to orientate, especially in the presence of an index. However, it is good to omit the page number on the forehead, on the completely white pages and, often, on the first page of each chapter, to maintain a cleaner and more professional aesthetic in your book formatting for printing.
How do you calculate the width of the cover coast?
The width of the coast depends on the total number of pages and the grammature of the card. Each print service, such as Amazon KDP or a local typography, provides a specific formula. For example, for the Amazon cream card, the number of pages is multiplied by 0.0635 mm. It is essential to make this calculation only after finishing the final layout of the text.
In conclusion, learning how to imply a book is an investment of time that will pay every author in terms of personal satisfaction and editorial success. We have seen how the technology of 2026 offers powerful tools, but that the real difference is made by attention to details, from the choice of correct fonts to the management of binding margins. A curated formatting not only enhances the content of your work, but establishes a pact of trust with the reader, communicating professionalism and dedication. Do not be afraid to experiment with the software presented, but always remember to respect the golden rules of classical typography. Once you have in your hands your first printed copy, stuck with your own hands, you will understand that every minute spent fixing a margin or correcting a widow was essential to give life to your dream. If you feel ready to make the big jump, start setting up your document today and finally transform your manuscript into an unforgettable book. Good imagination and good work!


